
Compiled ReactJS with Astro
This article can be used as an example for Coder Academy’s assessment item, “Technical Blog Post and Prototype”, for the ISK1002 Industry Skills 2 subject. I’ve kept this article focused on the rubric where I can, not necessarily the assessment brief - the rubric is what you’ll be graded on, after all!
For a walkthrough of how this article maps to the rubric, click this text.
- At least two referenced external sources to support an explanation of an industry-relevant trend or opportunity
- Usage of Astro to build static websites involving ReactJS components
- At least two referenced external sources to support an explanation of an industry-relevant ethical issue in detail
- SPAs vs SSR
- At least two referenced external sources to support an explanation of a problem or scenario and solution to the problem or scenario
- how to use ReactJS to make static compiled HTML without using React Server Components
- how to use Astro to make a ReactJS-based website
- how to automate the deployment of an Astro-plus-ReactJS website
- Article should include a plan covering the steps required to address the problem or scenario
- tutorial on how to set up Astro with ReactJS usage
- tutorial on how to set up GitHub Actions to automatically build and deploy the Astro-plus-ReactJS website
- Identify the essential skills, knowledge, tools, etc, required to implement the solution to the problem or scenario, explain why those are needed, identify alternatives to those identified things, and explain why the chosen things are used in the solution instead of the alternatives.
- comparison of Astro to other React frameworks
- identification of CI/CD systems, quick comparison of Netlify to GitHub Pages
- No formatting issues, and uses correct spelling & grammar throughout the article.
- This can be as “manual” as just spell-checking everything yourself, but I like automation. I’ve implemented a GitHub Action that runs two spelling & grammar tools: ReviewDog’s “misspell” action and ReviewDog’s “languagetool” action. They’ll validate and suggest fixes for the articles I write into this blog repository.
- Creates code with comments, comments are relevant to the project, comments are all easy to understand, and ideally stick to a specific commenting or documentation style.
- JSDoc comments to cover syntax-related commenting automatically, plus manually-written descriptions inserted into those JSDoc comments.
Each top-level dot point in the list above matches one rubric item (or rubric row, however you want to call it) in the assessment. If you’re working on this assessment yourself, you may benefit from planning things out in a similar list! Or at least, including a similar list into your work will help any assessment graders to see everything that you’re intending to show.
And no, this article does not get perfect marks for the rubric. It might meet a high distinction overall, almost definitely a distinction at least.
This article topic is not quite aligned with the assessment - it might actually be too big of a topic to cover within a reasonable timeframe at a “high distinction” level. Focus on something smaller than “here’s how to use a framework that combines different front-end libraries” because there’s just so much ground to cover in a topic like this. Just look at this article’s vertical scroll bar!
Something like “how to apply default headers to web requests without dependencies” or “how to create a custom logging system” might be of a more-reasonable scope.
So! Let’s begin.
ReactJS in “Current Year”
It is an understatement to say that ReactJS is a widely-used front-end framework. In Stack Overflow’s 2024 Developer Survey, the latest at the time of writing, the results are clear: ReactJS is the most-used front-end web framework by professional developers. 1
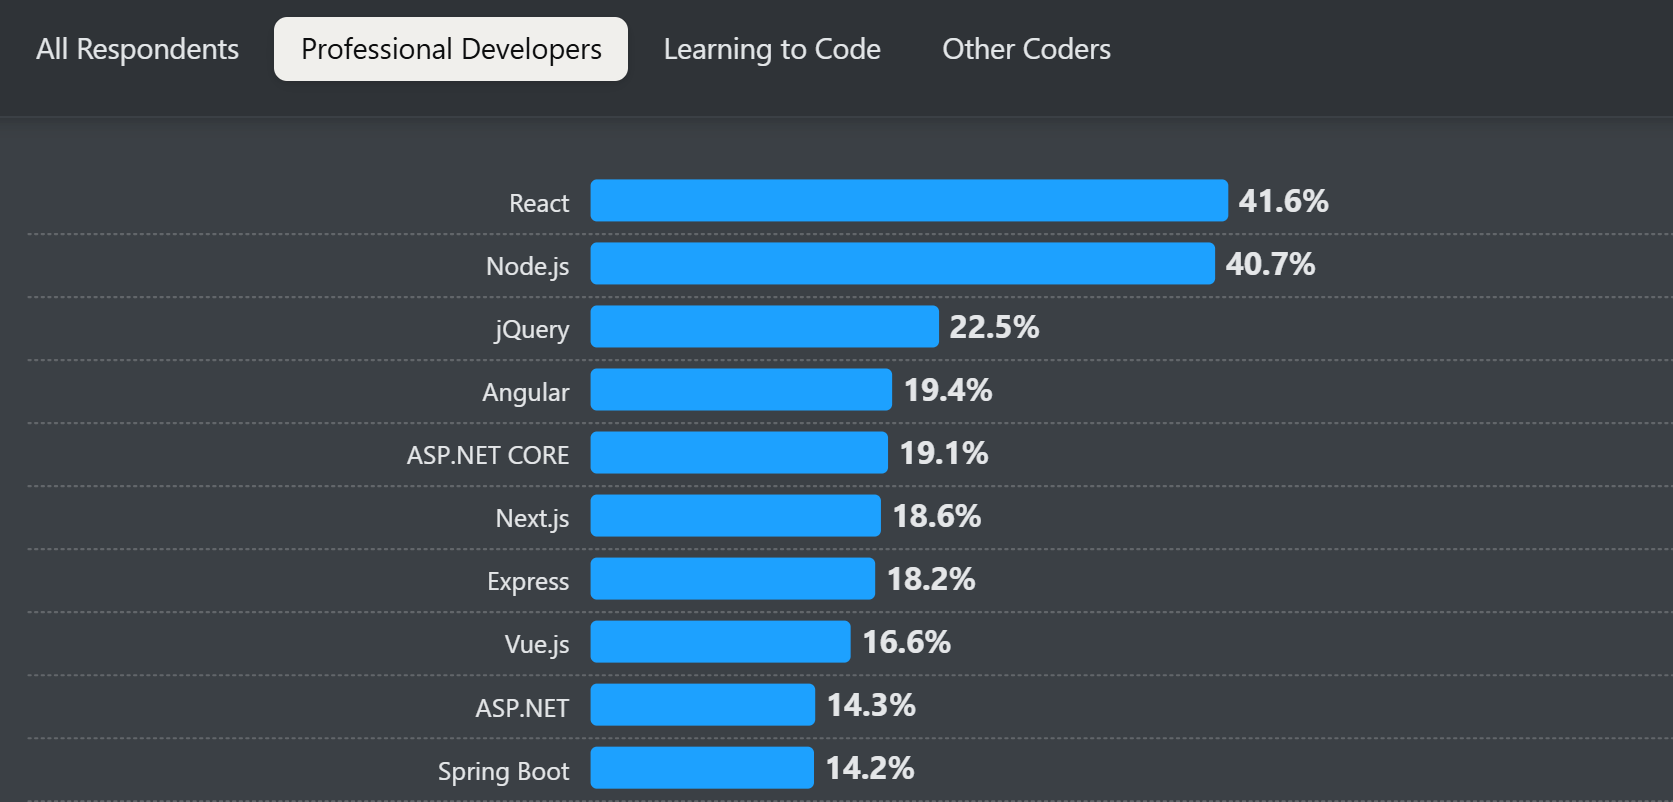
The results mix it in with other frameworks and technologies, but if you dig into what the other items are: ReactJS is the top pick for front-ends - the actual webpages that users see and click on - by a large margin.
ReactJS is still around and still widely in use over a decade after its first public release - and using it in various types of websites can bring great benefits to our projects. Components and stateful data can make a web project complex, but frameworks like ReactJS, including ReactJS, make those much easier to manage and implement.
The main ability that I really love from ReactJS is its ability to create components of content. Everything in ReactJS is a component, as part of its component-based architecture. This is really handy, especially in content-driven websites!
That means that we can have projects laying out pages in a way that adheres to “D.R.Y” principles - “do not repeat yourself”, minimise duplicate code in your projects and improve your workflow as a developer. Instead of rewriting the same headers, footers, navbars, and so on within each HTML file - we can write each of those just once in a component, and pass those components into whatever web content format file we want.
For ReactJS, that means writing components in JSX or TSX, and that gets compiled into HTML for browsers to use. It’s awesome. There’s a lot more to ReactJS than that, but for the sake of this article: that’s the important bit. Components.
Compiled Content on the Web
I’m a big fan of compilers - my first professionally-used “tech stack” with Unity with C#, which meant I was using a compiled language in a game engine that compiled games into executables for different operating systems and platforms. Compilers are a sign of “this is optimised for production usage, ready for customers” to me. I love it.
ReactJS has been around since 2013, rising to fame through its ability to make single-page applications (SPA) with good, reusable components. It’s stayed popular since its public release, and has been pioneered by developers for apps that scale to millions of users - specifically, developers working on Facebook. It’s great!
One of the downsides of ReactJS is that it - when used for SPA projects - puts so much content into a user’s web browser. When using ReactJS to make a SPA, users visit the index.html page of the website, that file loads the “compiled” ReactJS JavaScript content, and the JavaScript runs all of the ReactJS code that you and your development team have been writing. Routing and pages in a ReactJS SPA are emulated - they’re not real, separate HTML files.
This means that even after its compilation or build or bundle step, every bit of content in the ReactJS app is going to end up in the user’s web browser right from the start of their visit, no matter which page they visit. It leads to these things:
- A user’s browser may run more slowly due to the bulk of what it has received.
- A user’s browser may take longer to become interactive due to the bulk of JavaScript code that must be processed, and the nature of how ReactJS content is loaded. There are more round-trip network requests to make to retrieve data, and more CPU cycles spent processing JavaScript that might not even be relevant to the page that you’re visiting.
- A developer’s project architecture may change due to the unsecure nature of the web browser (e.g. no JWT generation secret keys should be in the browser).
- Search engine optimisation (SEO), website metadata, and scraping may be harder to implement and/or behave inconsistently.
To address those problems, recent years of ReactJS feature development has focused on a dedicated compiler system. They’ve created “React Server Components” (a.k.a “RSC”)2, a new system to help turn ReactJS components into static HTML content. Not just bundling up a ReactJS app into minified code for a singular index.html file to load, but actual, specific compiled HTML outputs. A server can compile a ReactJS component into ready-to-render HTML for a client to receive, or a web framework can compile ReactJS components to slot into separate HTML files as part of generating multiple static HTML pages.
There’s been a bit of confusion around React Server Components since their inception, across various articles and online forums and commentaries - an early draft of this article became very bloated when showcasing all of that! But it’s not the focus of this article.
Instead, what we can keep in mind with React Server Components (RSC) is that they are part of ReactJS’ shift into being a foundational or base-layer part of other web frameworks. Other web frameworks such as Vite, Astro, and Next.js, use ReactJS as a part of their system, and those web frameworks have their specific ways of implementing RSC so that we don’t have to do that ourselves.
Essentially, we need to think about what type of websites we want to build.
- For a website with user-generated content, such as a social media platform or two-sided marketplace, we should want a single-page application or a server-side-rendered application. The routes depend on user content, which means routing is not completely known until a user tries to use the website.
- For a website with sensitive content from any source, such as a banking web app, we should want a server-side-rendered application. No reason for sensitive data to exist anywhere but the secure server’s database until the user wants to see it.
- For a website with developer-generated content, such as a documentation website, developer portfolio website, or a product advertisement website, we should want a static multi-page website. Content only changes when the website is deployed, which means we can use a compilation or build step in the deployment process to turn any content into dedicated HTML files.
I’m going to focus on the last one: a static multi-page website.
We could go and make a traditional HTML/CSS/JS website ourselves, with plenty of HTML files. That’s fine. As a teacher, that’s what I start my students with to help introduce web programming concepts in a focused, simple way. It works. But we don’t stay at that level, especially as we move to the more-skilled, later-stages of the course.
For example, this website that you’re reading this article on right now. It’s built as a compiled multi-page website. I don’t really write much HTML to make this website, but you’re viewing HTML. That’s what compilation can do for us - whatever workflow we want to use can become web-friendly content because it gets compiled into that web-friendly content.
There are other factors and features that we can keep in mind as well:
- Search engine optimisation.
- SPAs and SSRs typically suck at this.3
- It’s doable in those types of websites, but doesn’t consistently work or is a giant pain to implement, or both.
- Social media shared content previews.
- SPAs and SSRs typically suck at this.3
- Paste this article’s URL into your favourite social media platform and see what the preview looks like. We can customise that through our code. It’s awesome.
- Content caching.
- SPAs generally suck at this, SSRs do not really do this by nature of being rendered by the server.3
- When a website doesn’t really change that often, caching helps decrease the cost of being popular. Web traffic incites costs, and static website deployment platforms such as Netlify have a generous free tier - but caching helps us avoid costs even more, on top of any free tiers.
Now, ReactJS being a library for other web frameworks to use means that we don’t just use ReactJS directly and go crazy with that. No - we must find a good web framework, and in particular, we must find a good web framework that has easy-to-use features and documentation to allow us to create static multi-page websites.
A developer portfolio, single-author blog, product landing page, a documentation page - any of those types of websites will benefit from the content below.
Enter: Astro
Astro is a very modern web framework, with version 1.0 released in 2022.4 It has integrations with the most popular front-end libraries, including ReactJS, as well as other tooling like TypeScript. It even has its own SQL database adapter!5
It can basically do everything, and from what I’ve explored - it does things really nicely.
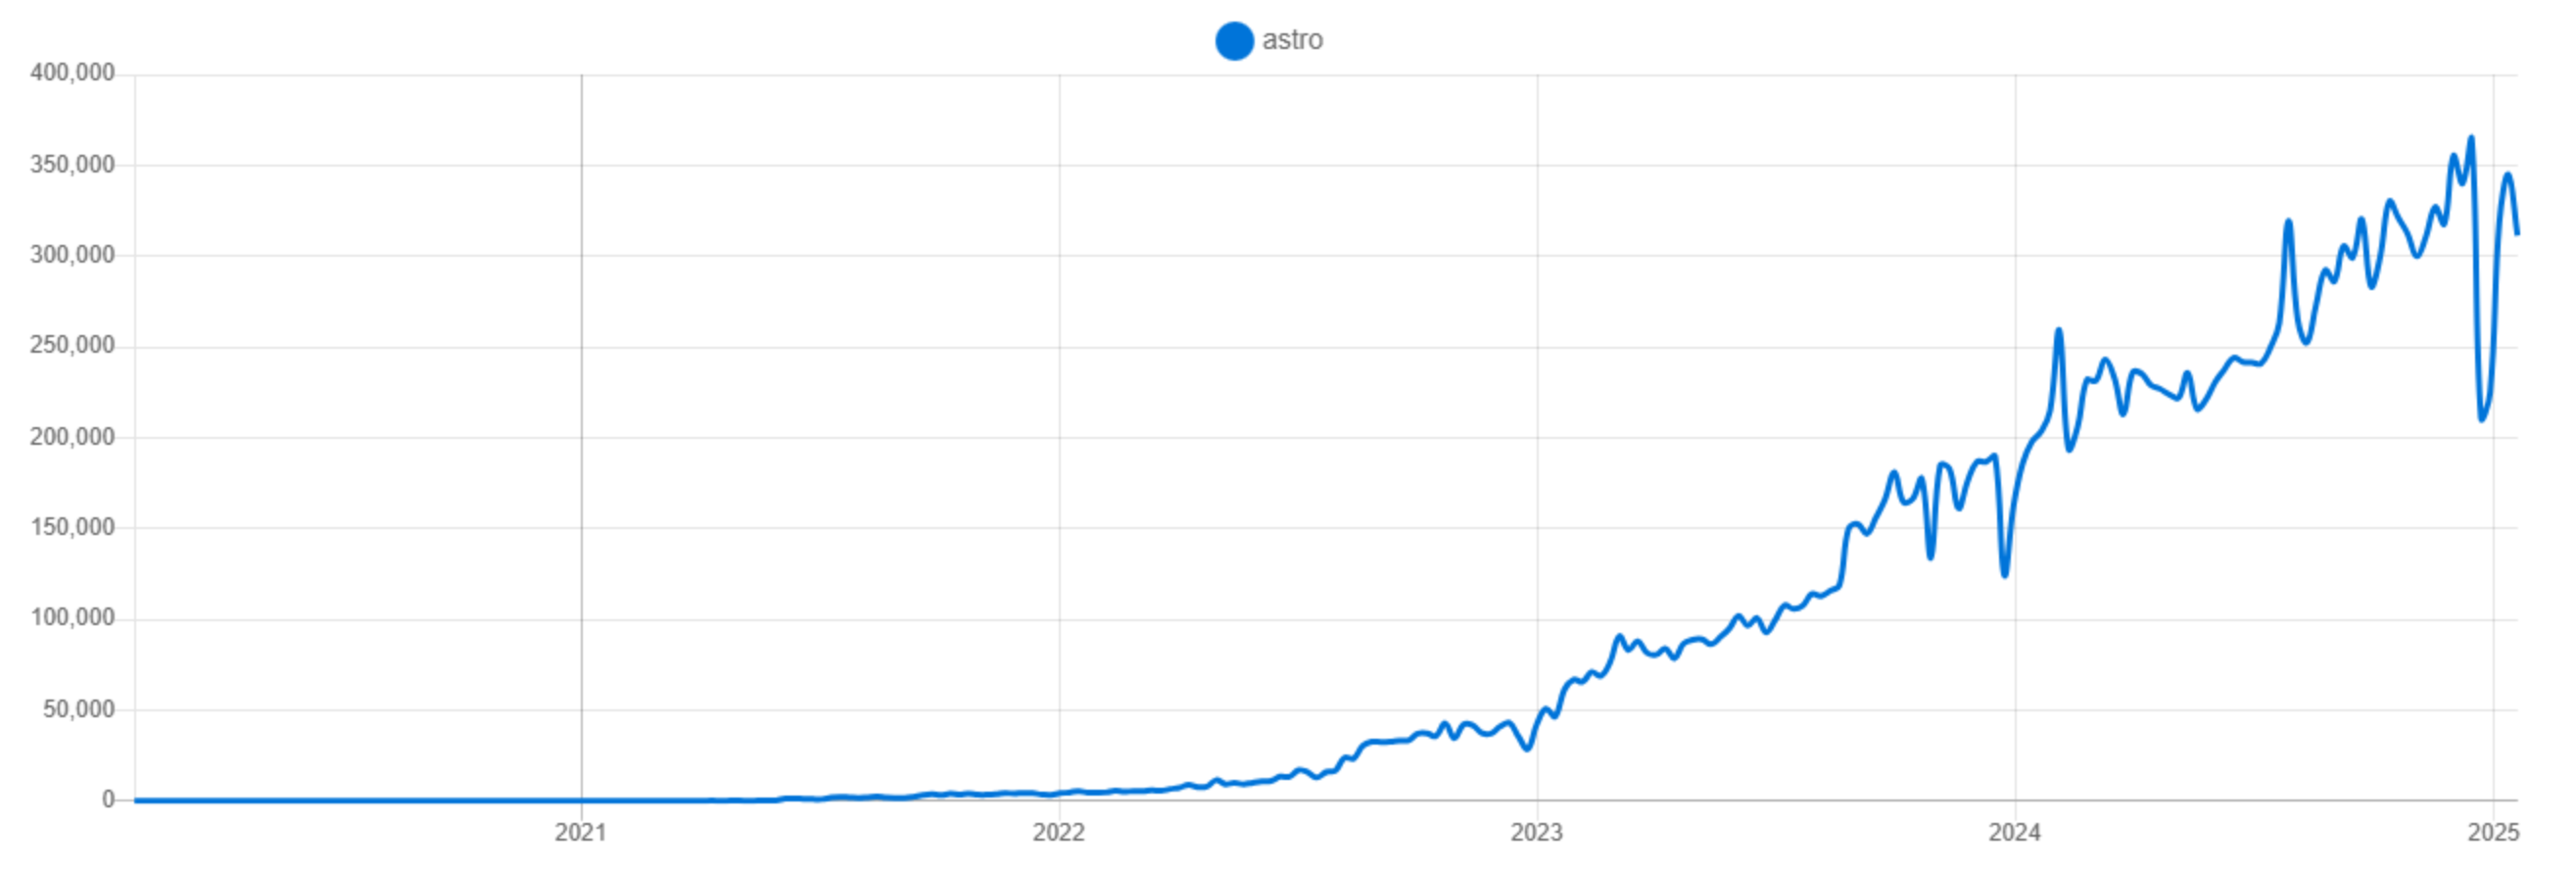
Astro has been gaining popularity in every year since its first public release, with downloads increasing consistently per NPM Trends6:
However, it is not the “top dog” of web frameworks. Not even close. Compare to NextJS (a popular framework pushed by Vercel, a web app hosting platform) and Vite (a modern alternative to Create React App, the best way to make SPAs at the time of writing) on NPM Trends7:
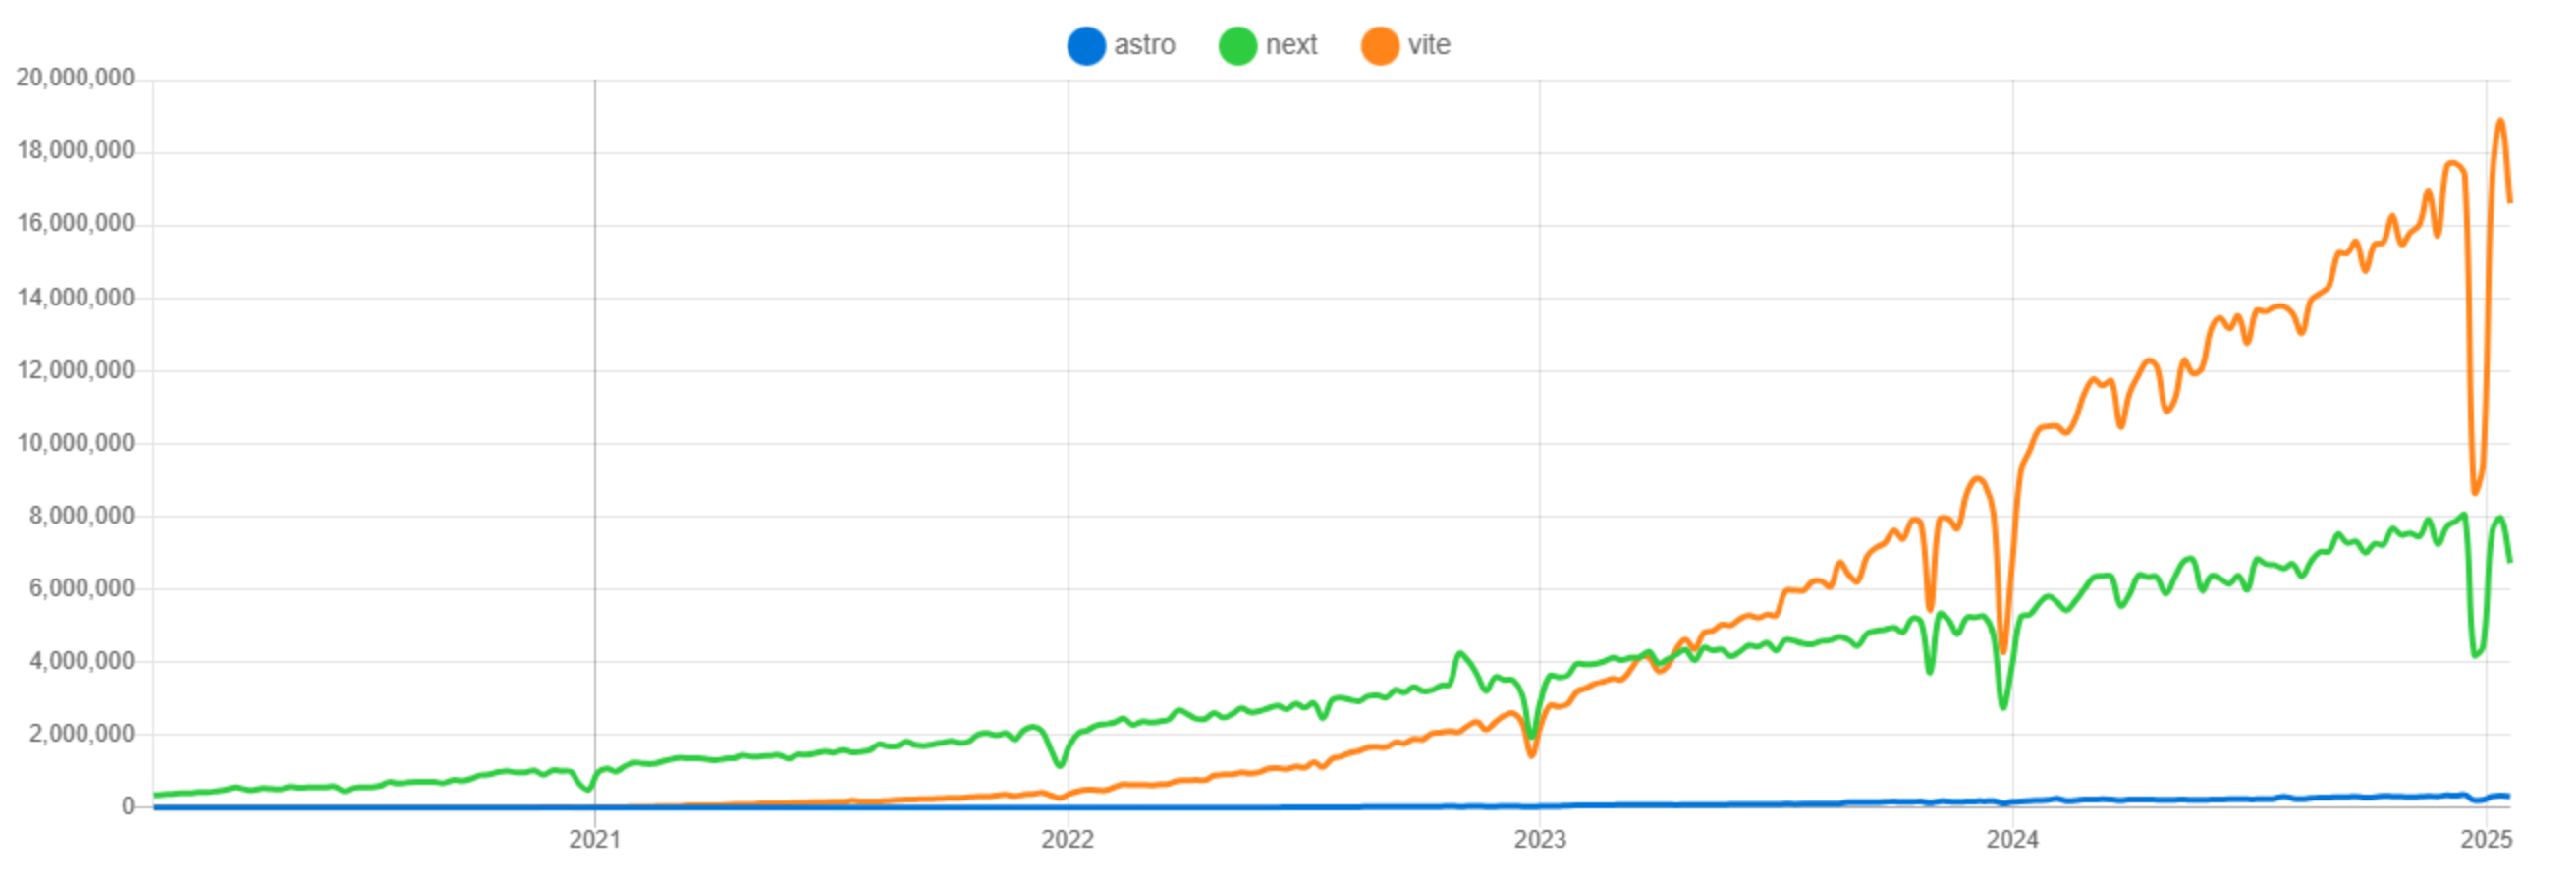
This stark difference in usage doesn’t mean that we shouldn’t use Astro - but it means we need to be aware of what Astro can do extremely well that other frameworks can’t easily do or can’t do well.
For us, that is quite literally static content-driven websites. Just like this one.
If you want to have an easy-to-manage, easy-to-deploy, cheap and/or free website just like the one that you’re reading right now: use Astro. It makes it so easy to make this type of website. Read on to see how.
Creating a Minimal Astro Project
So, let’s get started and build a website using Astro and ReactJS!
I keep everything backed up, so for this project that means we need some version control. I’m going to make a repository on GitHub. The repository should be empty - it just needs to exist, for now, and then Astro will add things into it when we start using it. Things get a bit messy if we have files in the repository already - but it’s usually a matter of copying things around if that happens.
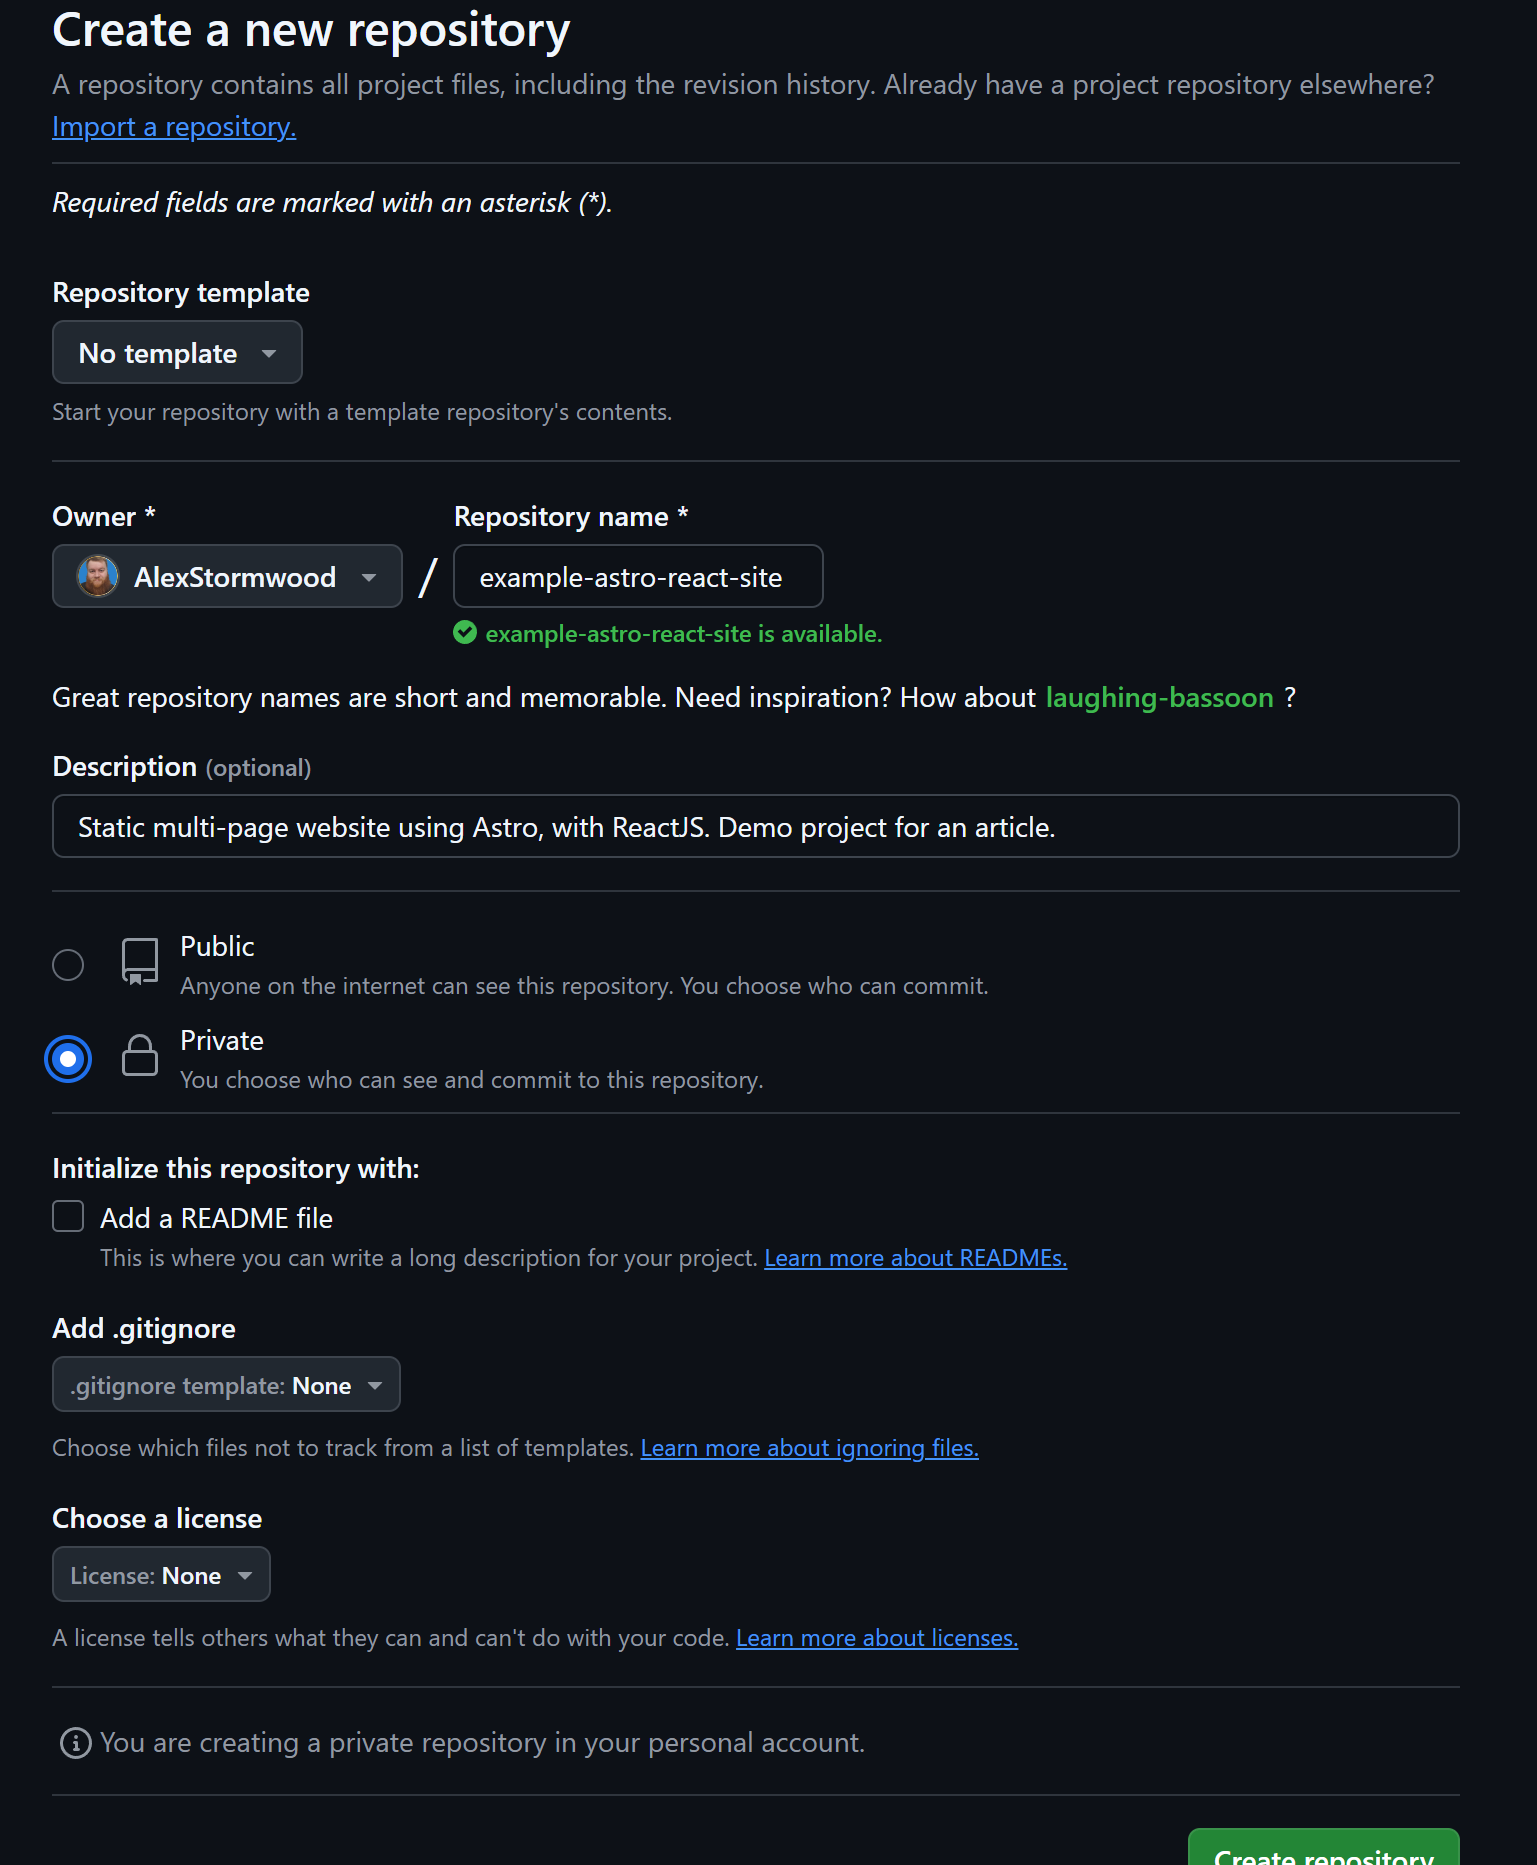
Screenshot from the GitHub website, showing the form to make a new repository.
In the screenshot above, the repository is private - you don’t have to do that. I do that because it helps me stop curious students going “oh, this repo is empty junk, what a silly educator!” - the repository will become public by the time you’re reading this article!
Since I have GitHub Desktop installed already, after I make a repository, I can easily clone it down using a button on the webpage.
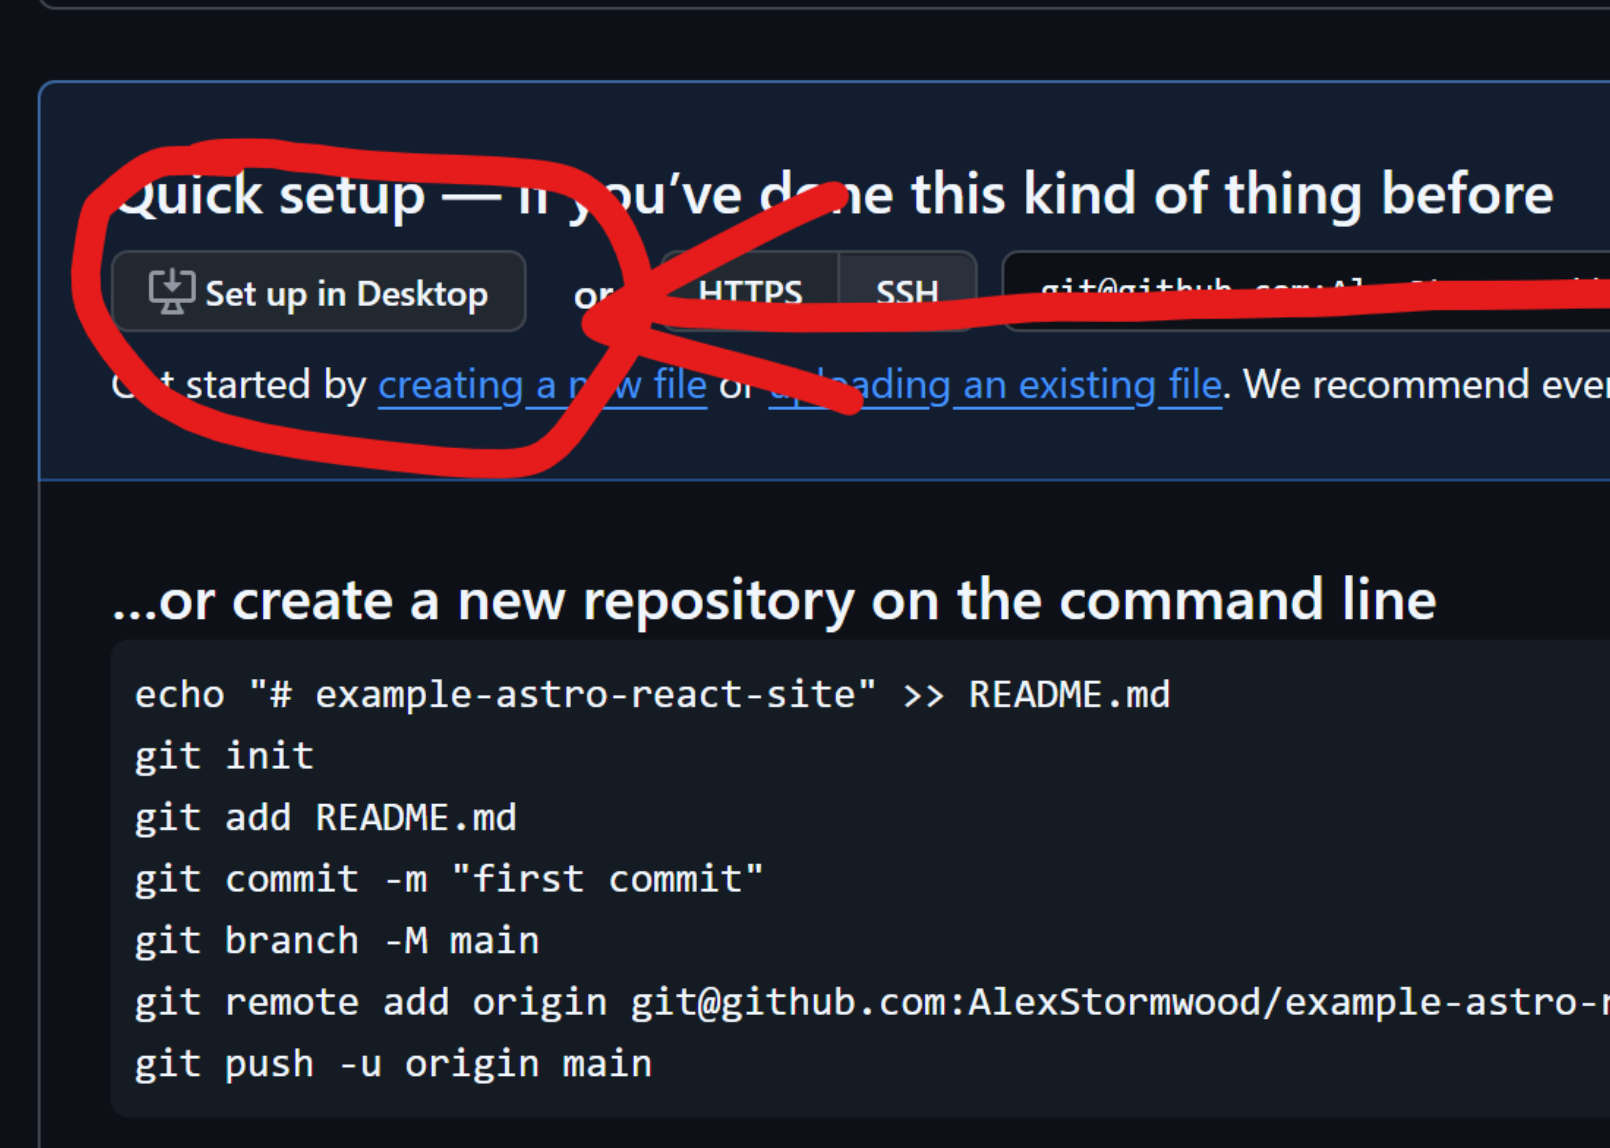
Screenshot from the GitHub website, showing the landing page of a new empty repository.
If you don’t have a Git GUI client, use the command line instructions on that same landing page to set up your local repository and connect it to the remote GitHub repository.
Either way, we need to open up the local repository in our favourite coding editor. For me, that is Visual Studio code.
And, we need to open up the local repository directory in a terminal that has NodeJS installed. Visual Studio Code’s embedded terminal can cover this requirement, or a standalone terminal will work as well - just as long as it has NodeJS installed!
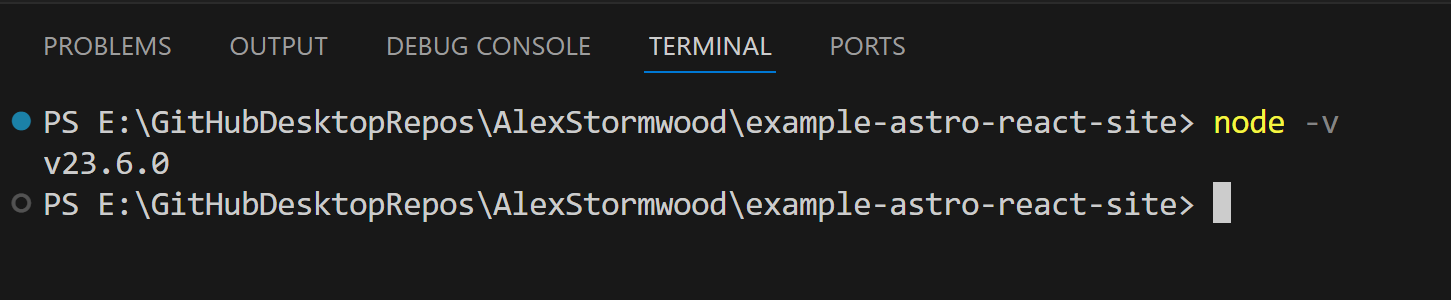
Screenshot from a terminal window showing that NodeJS is installed and the local repository for this project is open.
In the terminal for the repository, we need to run the command:
npm create astro@latestThis uses the NPM available in your NodeJS installation to execute the Astro package, which will guide you through a series of prompts to determine the project files that will be generated for us to start working with.
You’ll notice that, by default, it’ll try to make a project in a subfolder of your current terminal directory. We don’t need to do that, especially if our current directory has no other files in it!
Similar to when we make a regular ReactJS application, here’s what it looks like if we allow that subfolder to happen in our Astro project creation process:
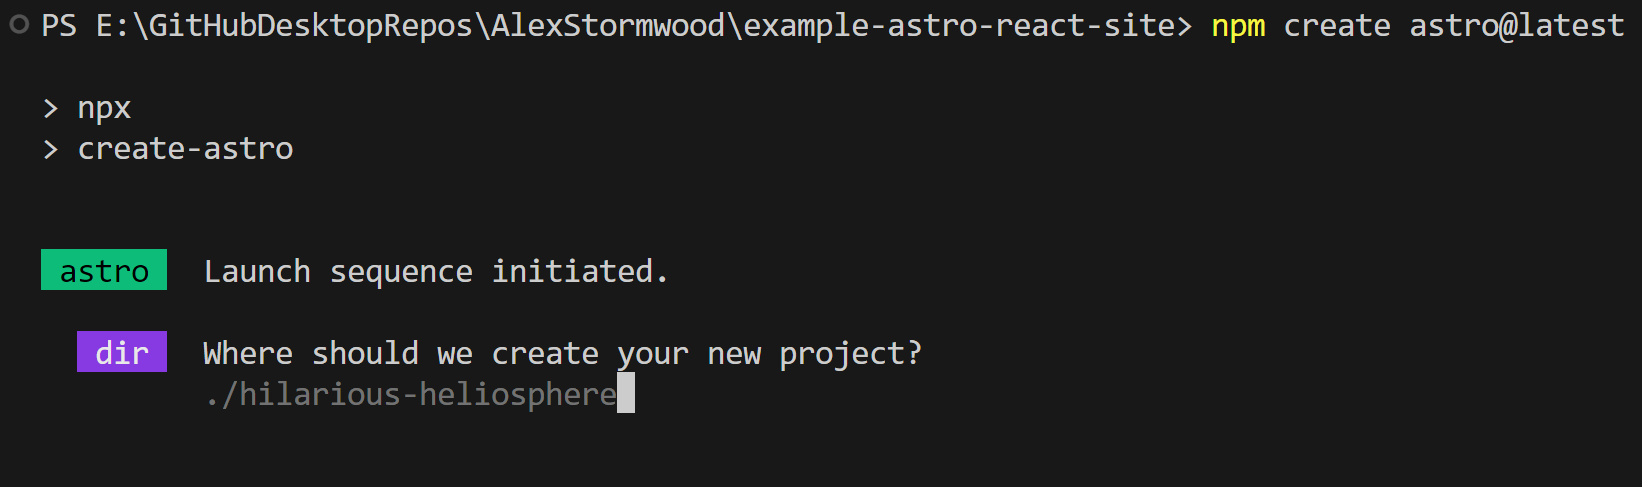
Screenshot from a terminal window showing an Astro project creation prompt creating a new subfolder.
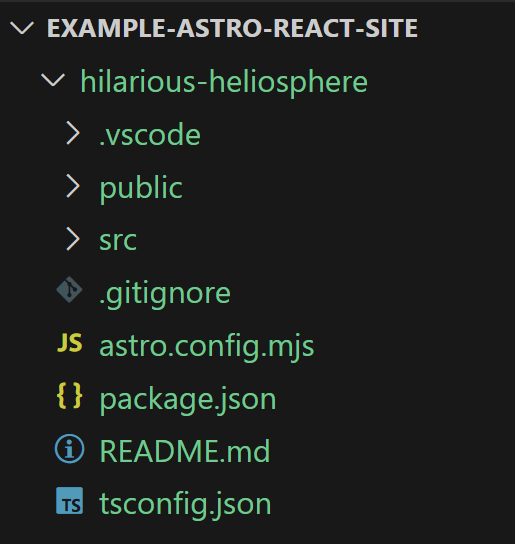
Screenshot from the Visual Studio Code project ‘Explorer’ section, showing a subfolder in the project’s root directory.
This can cause some hassles when deploying our work, running our work, or adding NPM packages to our work - we have to work in a subdirectory, not the project directory. Remembering to cd into the subfolder often trips up my students!
So instead of that, we can simply type . as the directory option when making a new Astro project:
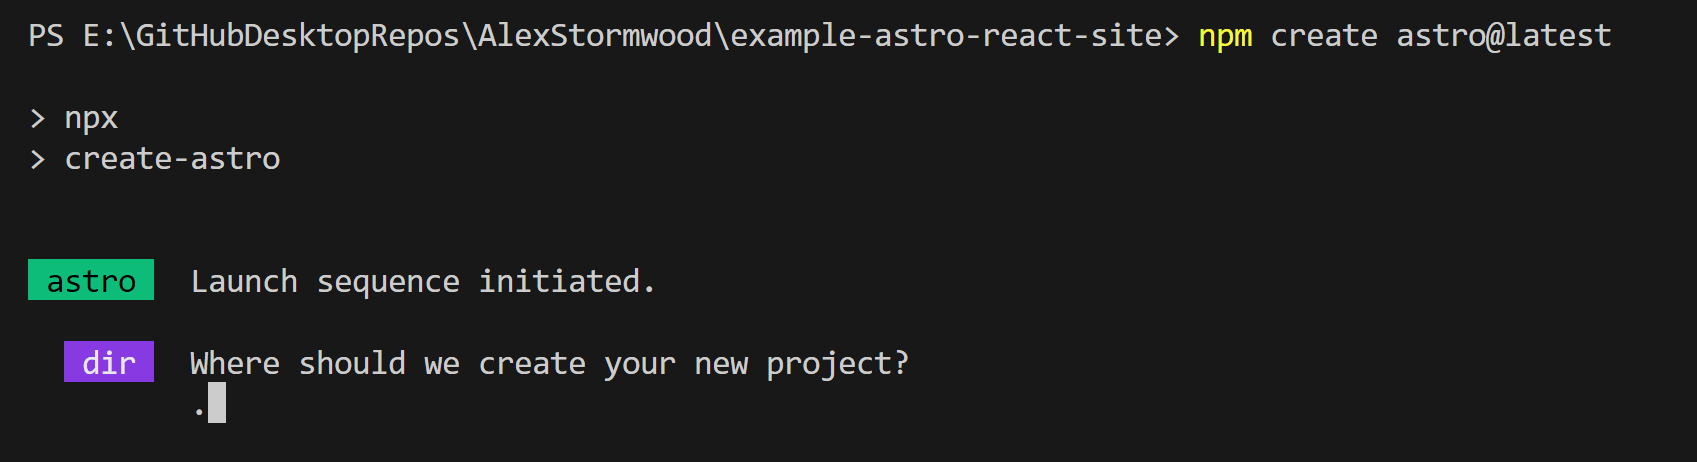
Screenshot from a terminal window showing an Astro project creation prompt creating a project in the current terminal directory, no subfolder!
We can accept the defaults for the rest of the Astro project setup prompts, and we can choose the “basic, minimal starter” template for now.
Because our current directory already has a hidden “git” folder, Astro detects that as part of its setup process.
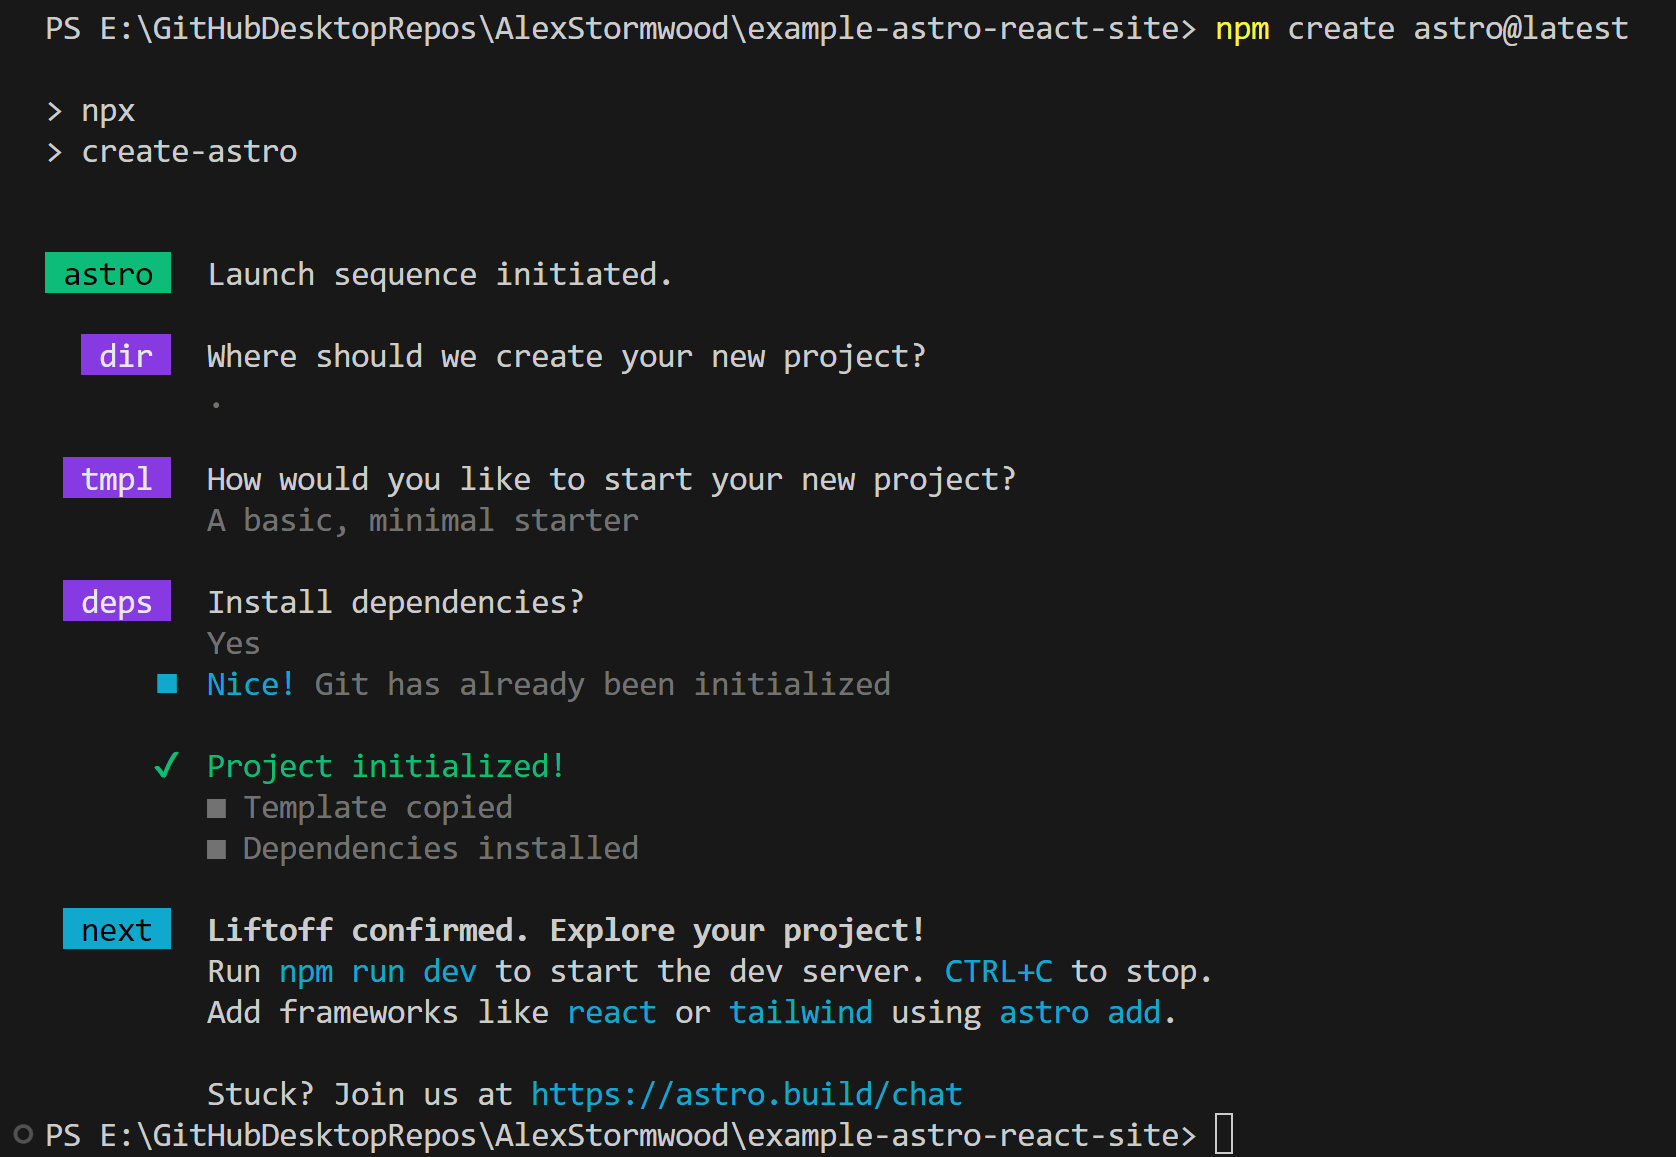
Screenshot from a terminal window showing an Astro project creation prompt in its entirety.
With that, we can run the newly-created Astro project to see what we’ve got!
Per its instructions, we can run a command to get started with viewing our project:
npm run dev
Screenshot showing an Astro project in the web browser.
Now, we don’t have ReactJS in there yet, but let’s take a second to understand what Astro provides for a minimal project.
Have a look in your file explorer for the project. You should see something similar to the below:
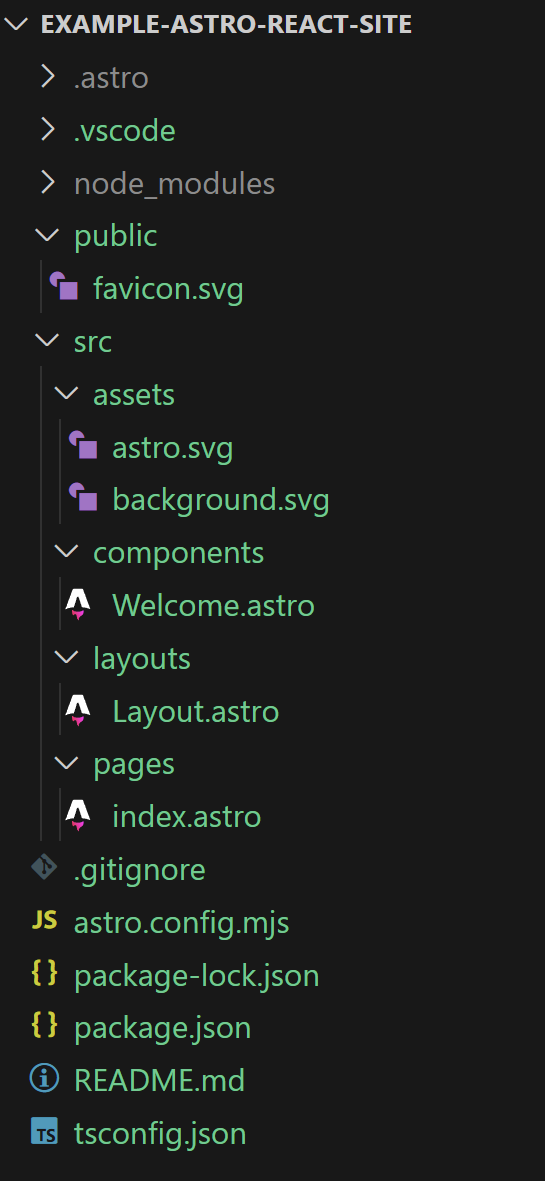
Screenshot showing a file explorer view of the Astro project, showing each of the files in the project’s folders.
Of particular note - and as mentioned by the Astro project’s default landing page in the web browser - is the pages directory within the src directory of the project. Every file within the pages directory gets compiled into its own HTML file. Consider the below:
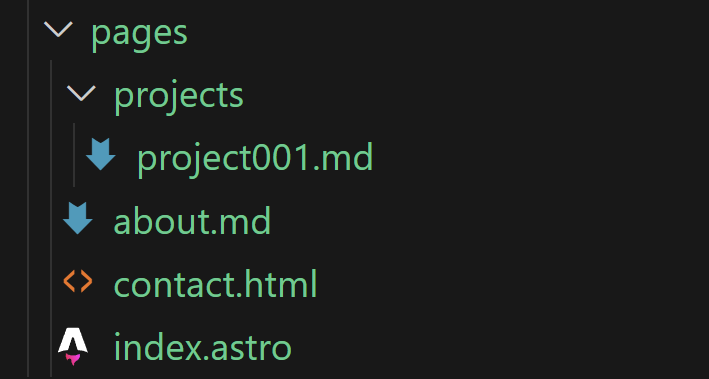
Screenshot showing a file explorer view of the Astro project, showing each of the files and folders in the project’s src/pages directory.
Astro turns that folder structure into the following routes, each route with its own HTML file:
/- This is the
index.astrofile in the root of thepagesdirectory.
- This is the
/about- This is the
about.mdfile in the root of thepagesdirectory.
- This is the
/contact- This is the
contact.htmlfile in the root of thepagesdirectory.
- This is the
/projects/project001- This is the
project001.mdfile in theprojectsdirectory within thepagesdirectory. Nested folders lead to nested routes!
- This is the
Now, it’s cool to be able to use those different file types, sure, but the .astro file type is an Astro catch-all or combine-all file type. We can mix and match content from different languages within that file type, because Astro has such a comprehensive compilation system!
So, let’s take this a step further…
Using ReactJS with Astro
If your Astro app is running, stop it. We need to run a command in our project’s terminal!
npx astro add reactThat command runs the latest version of Astro’s project system to add a ReactJS integration into your existing Astro project. It’s pretty nifty. It’ll prompt you to let it automatically install some additional NPM packages:
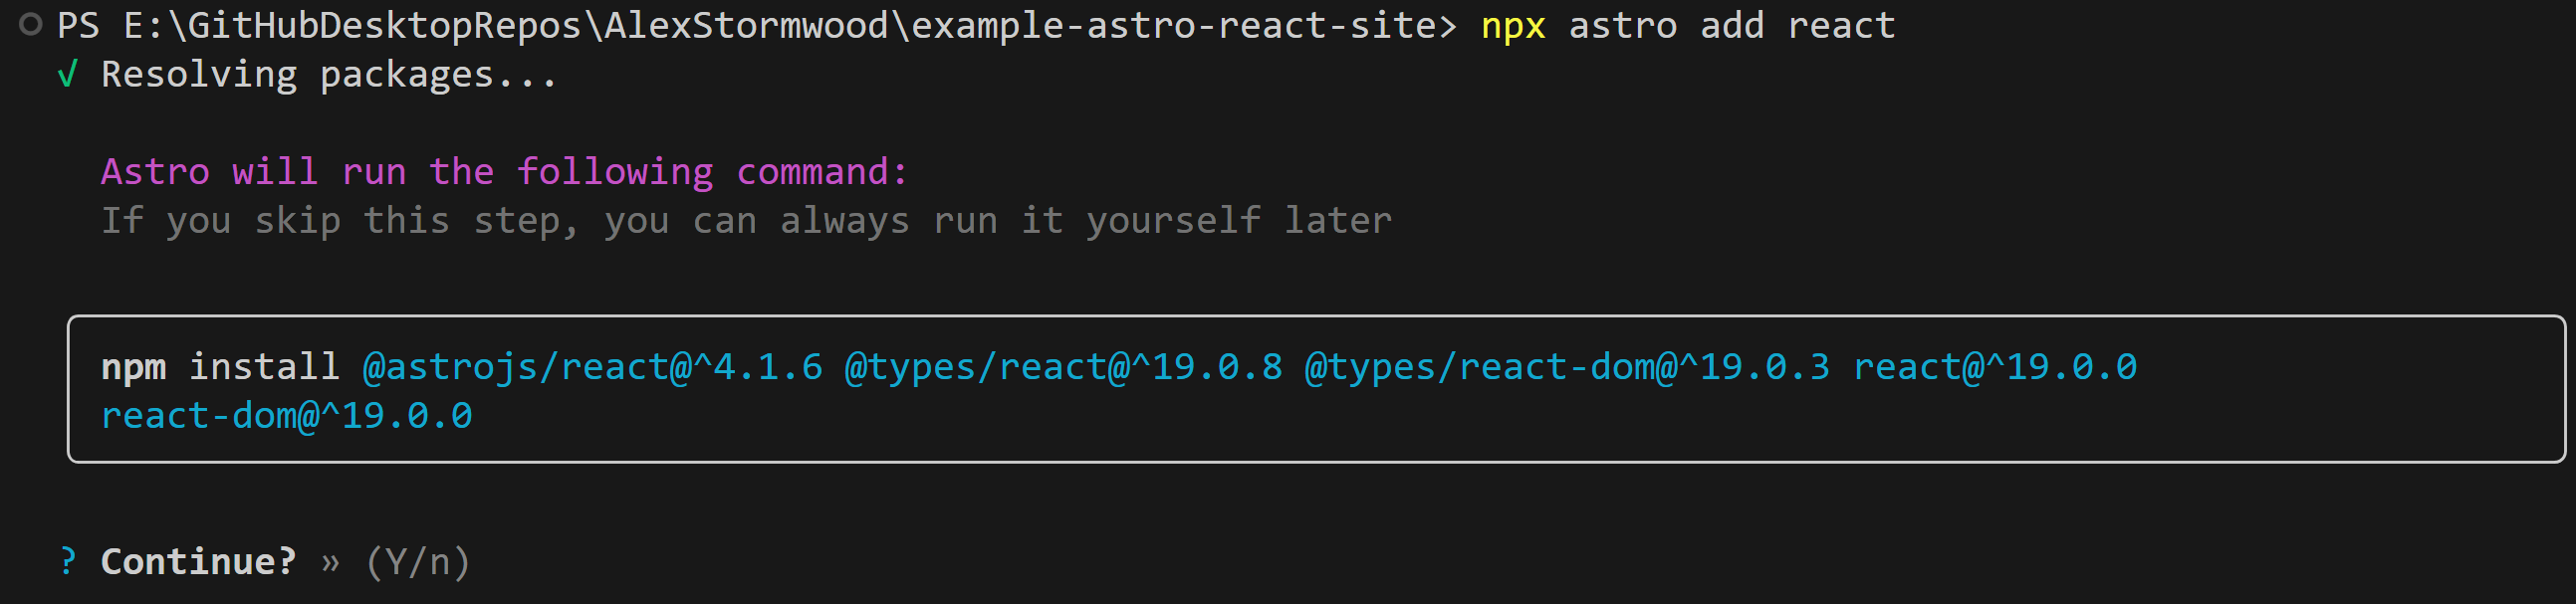
Screenshot showing a terminal of an Astro project, where Astro is asking for permission to install additional dependencies from NPM.
Then, it’ll prompt you to allow it to modify your Astro project’s config file and then the project’s TypeScript config file. No, you don’t need to use TypeScript yourself - but as part of that amazing Astro system that lets you write however you like, TypeScript config exists already.
Essentially, we’ve added Astro plugins and dependencies to allow Astro to detect and correctly work with ReactJS JSX and TSX file types, as well as inline components.
Now, let’s actually make some ReactJS code!
Astro provides a components directory for us already - it’s best to just use that to store our ReactJS components. You can make additional subfolders in there for organisational purposes, too, but for now, let’s keep things simple. Create ExampleComponent.jsx in the project’s components directory.
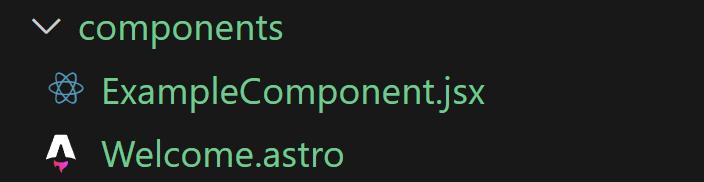
Screenshot showing a file explorer view of the Astro project, showing the components directory containing two files: a new ‘ExampleComponent.jsx’ and the pre-existing ‘Welcome.astro’ files.
A ReactJS component that simply displays some data is perfectly fine to do, and would look like:
export default function ExampleComponent(){

	return (
		<div>
			<h1>This is a ReactJS component!</h1>
		</div>
	)
}
You can import it into your .astro files and use it like a typical ReactJS component. Like so:
---
import ExampleComponent from '../components/ExampleComponent';
// Commenting out the Welcome component that Astro provides for the sake of staying focused!
// import Welcome from '../components/Welcome.astro';
import Layout from '../layouts/Layout.astro';

---

<Layout>

	<!-- Commenting out the Welcome component that Astro provides for the sake of staying focused! -->
	<!-- <Welcome /> -->

	<ExampleComponent />

	<h2> Example HTML content to show mix-and-match Astro content compilation.</h2>

</Layout>
There’s a few things happening within that Astro file, but in a nutshell:
- The top section between the opening and closing
---is called “front matter”, and allows us to import JavaScript as well as execute some JavaScript. We can import components and set up variables and things in there - you’ll see more later in this article. - After the front matter, we can set up the page content. This is “mix and match whatever you like” territory - though some formats need a bit of additional work to mix and match properly. If you treat an Astro file like it’s a JSX file, you don’t need to do anything further.
- If you want to explore something on your own, you can mix and match Markdown content by importing and rendering it as explained in the Astro documentation here8: https://docs.astro.build/en/guides/markdown-content/#the-content—component
That content will look like this in the browser, as the Welcome component held additional CSS styling:
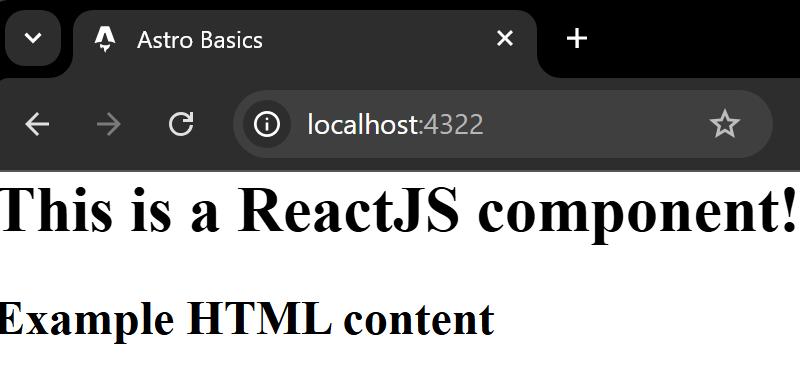
Screenshot showing an Astro project in the web browser.
However, for something more interactive, there are some additional things we must sort out. We need to circle back to that ExampleComponent.jsx file and make some edits!
Consider a ReactJS component like this (overwriting your existing ExampleComponent.jsx file, if you’re coding along):
import { useState } from "react"


export default function ExampleComponent(){

	let [counter, setCounter] = useState(0);


	return (
		<div>
			<h1>This is a ReactJS component!</h1>
			<button onClick={() => setCounter((previousValue) => previousValue + 1)} >
				Increase the count.
			</button>
			<h2>
				Counter: {counter}
			</h2>
		</div>
	)
}
That component will involve the ReactJS state system. It’ll keep track of a value and a user can interact with the page to change that value.
But it won’t work.
It looks like this in the browser:
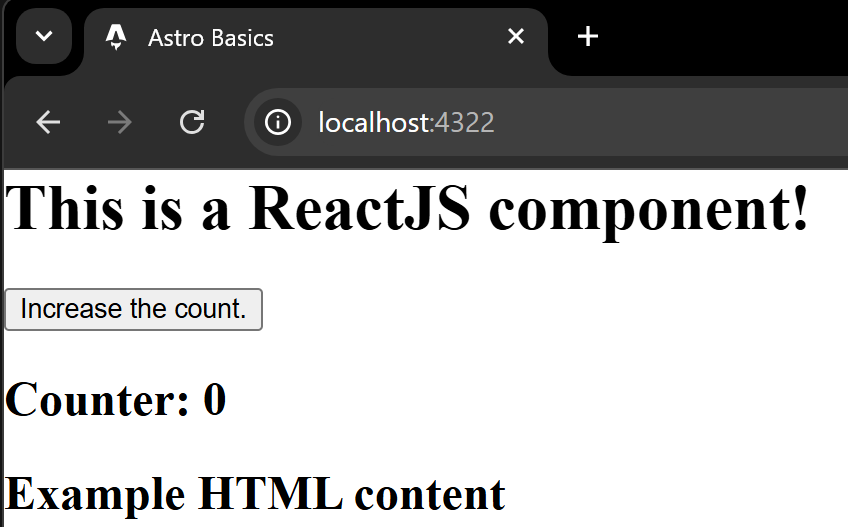
Screenshot showing an Astro project in the web browser, showing a new button and a section to display a counted number.
The issue is that Astro, in its awesome process of compiling the content into a static site, stripped out JavaScript wherever it could. If it saw some JavaScript that seemed dubious or that it wasn’t sure how to handle, that JavaScript was removed.
By default, Astro does not know how to handle interactive ReactJS components.
We need to circle back to our index.astro file to instruct Astro how to work with the ReactJS component that we’re trying to render.
Whenever we render a ReactJS component that does something beyond just display unchanging content, we need to use an Astro rendering directive. One of these options:
<!-- The component's JavaScript will activate as soon as it is able to, essentially as soon as the page loads it.  -->
<ExampleComponent client:load />

<!-- The component's JavaScript will not activate until the component is visible on the page. Useful for long pages with many components. -->
<ExampleComponent client:visible />
There are additional directive types available, but they aren’t relevant to our static multi-page website project. If you’re going to build server-side-rendered projects with Astro, you may want to dig into their documentation on “Hydrating interactive components” for more information.9
But that’s it! With one of those directives in place, our imported ReactJS component will work on whatever page we view it on.
The final index.astro file looks like this:
---
import ExampleComponent from '../components/ExampleComponent';
import Layout from '../layouts/Layout.astro';

---

<Layout>
	<ExampleComponent client:visible />

	<h2> Example HTML content</h2>
</Layout>
Pretty neat, right?
But wait, there’s more!
Blogs With Astro
Astro is so powerful, that a blog making use of the above is really just all the same as the above - but we choose a different template when making the project!
Yes, if you’re coding along, delete everything in that minimal Astro ReactJS project. Commit to version control and push it up to the remote GitHub repository if you want to!
In an empty project, run the Astro “create” command again.
npm create astro@latest
This time, we want to choose the “blog” template. There are other officially-showcased themes out there10, but we can stick to the suggested blog for this bit.
Same other settings as last time - use a ”.” as the directory to put the project in the current repository’s root directory, accept all the other defaults and make sure dependencies are installed.
Then, add ReactJS again.
npx astro add reactRun the app to make sure it works!
npm run devIt should look something like this, especially on the “Blog” page:
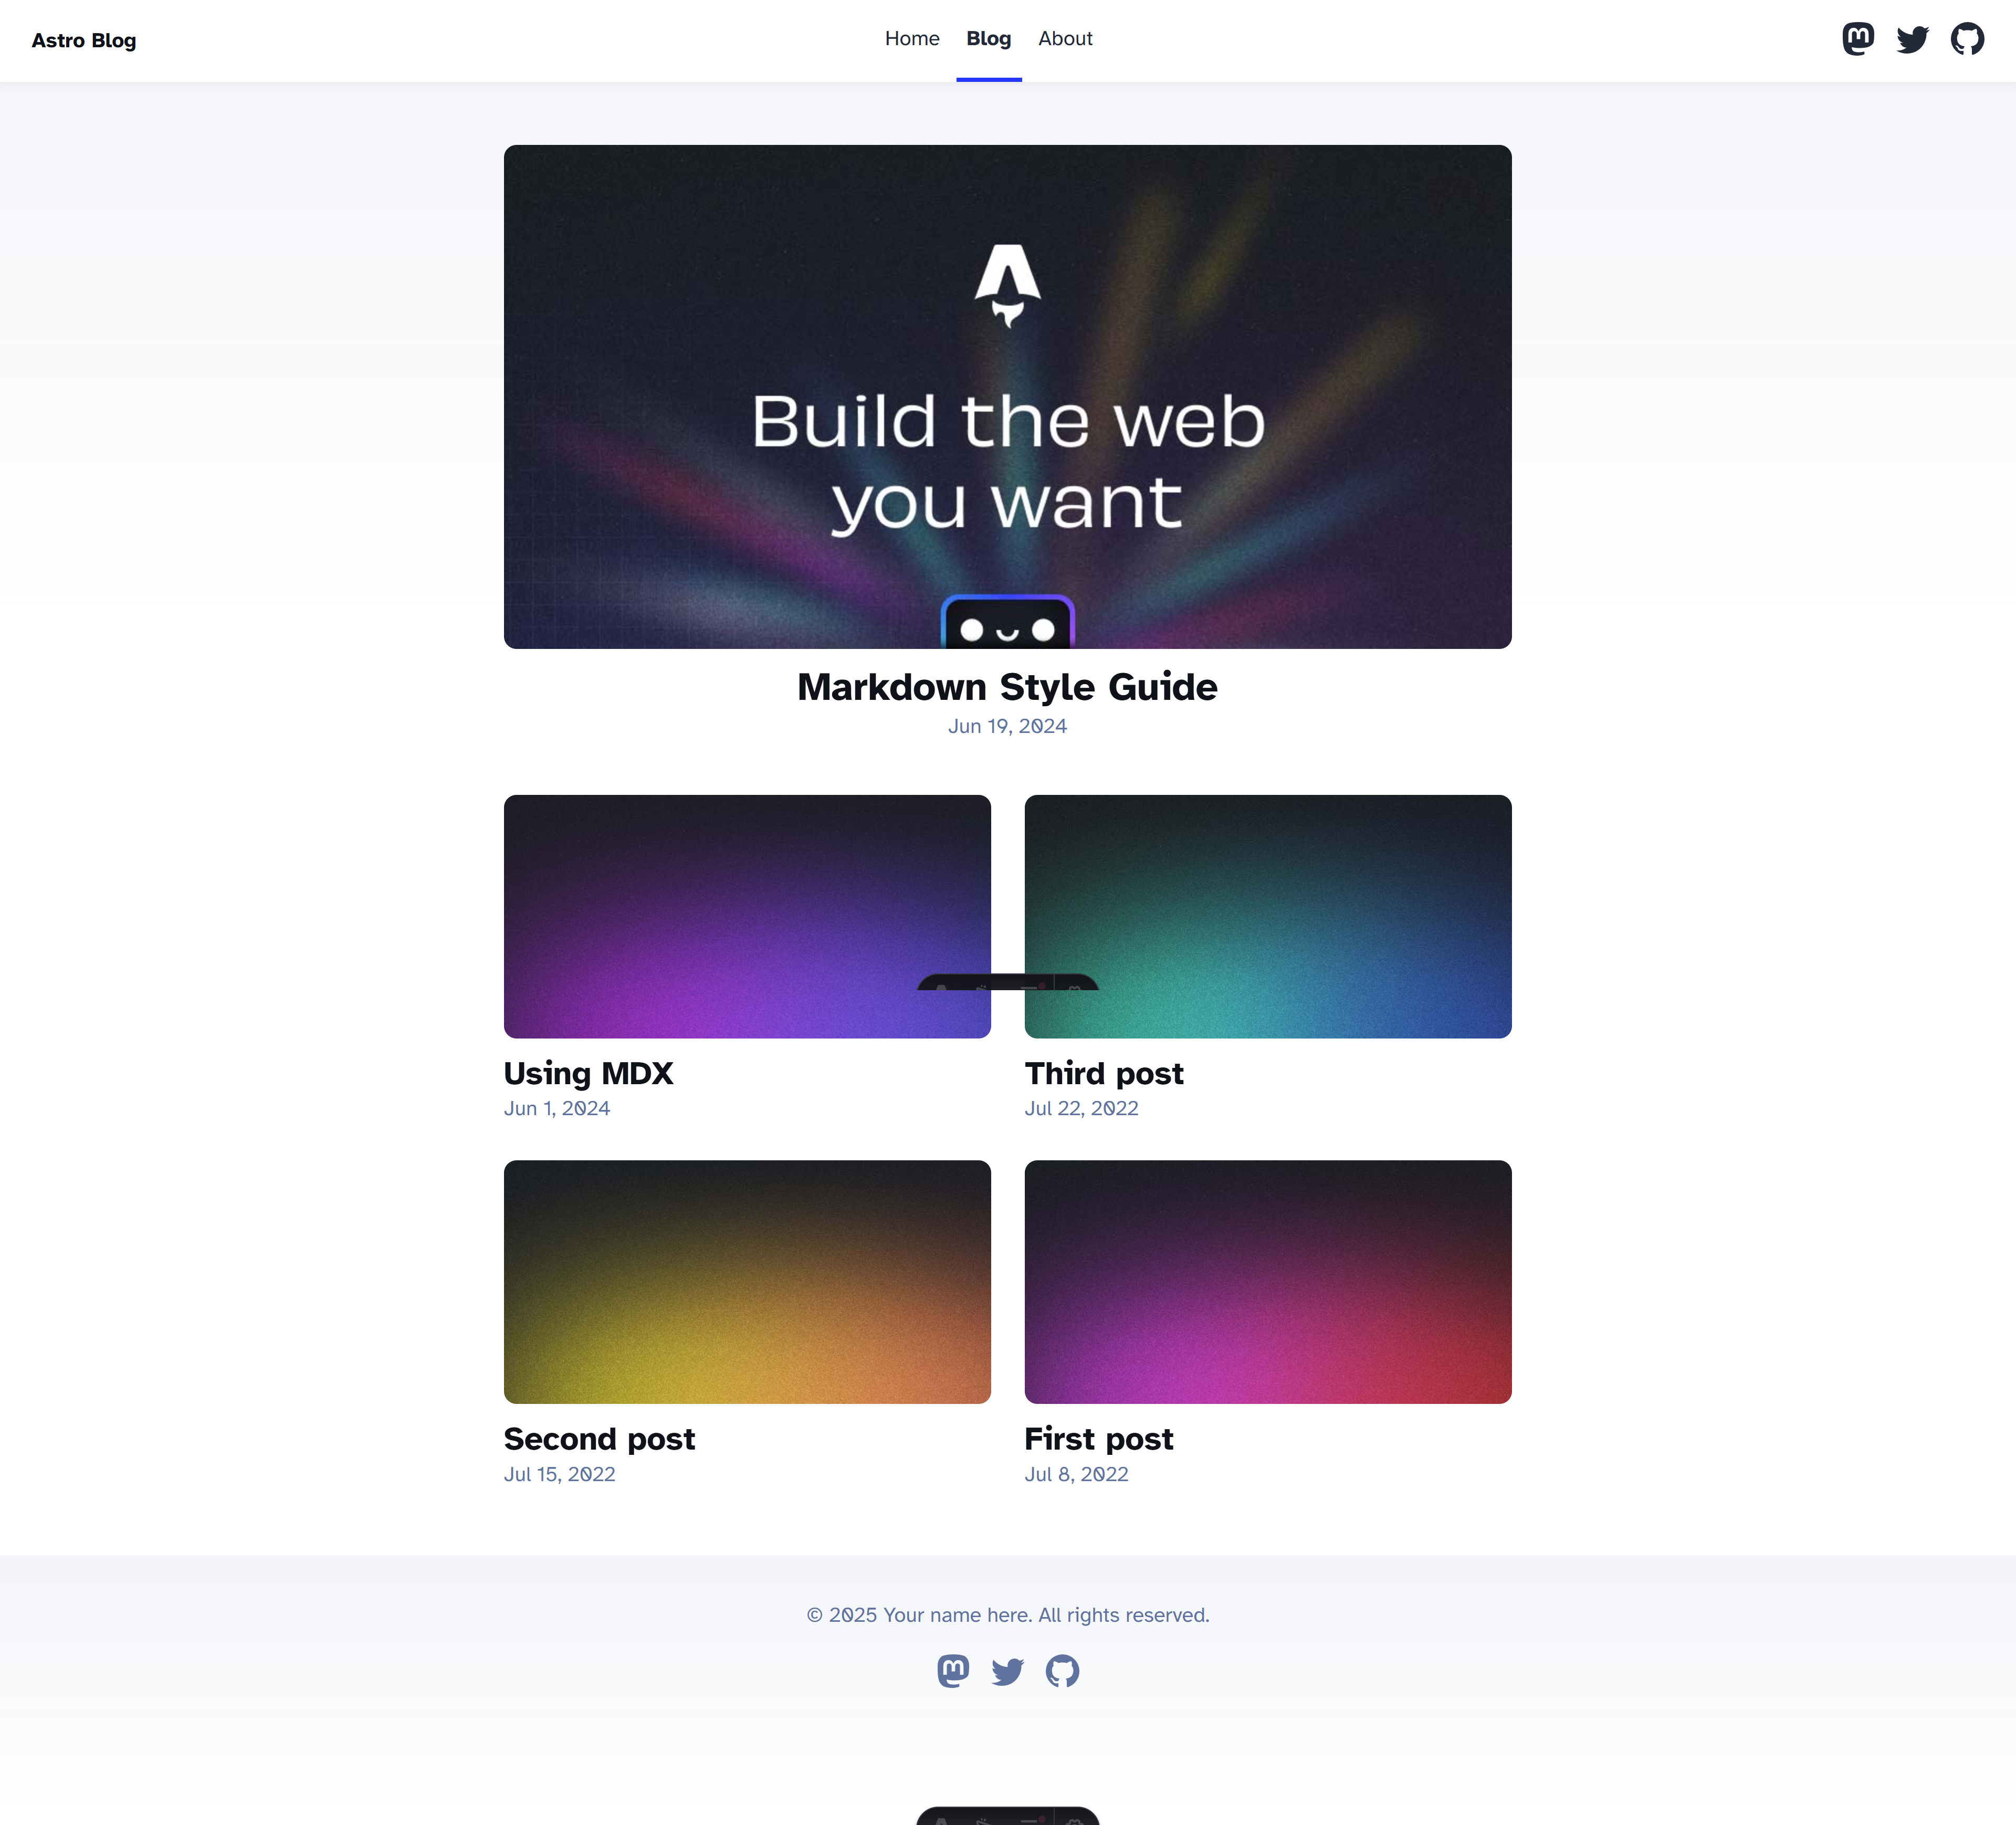
Screenshot showing an Astro project in the web browser, showing an index page listing multiple blog posts.
In this particular Astro template, there are many more files and folders provided by default. There’s a complex system in place to convert content from the src/content directory into organised content across multiple HTML files. It’s a real powerful template!
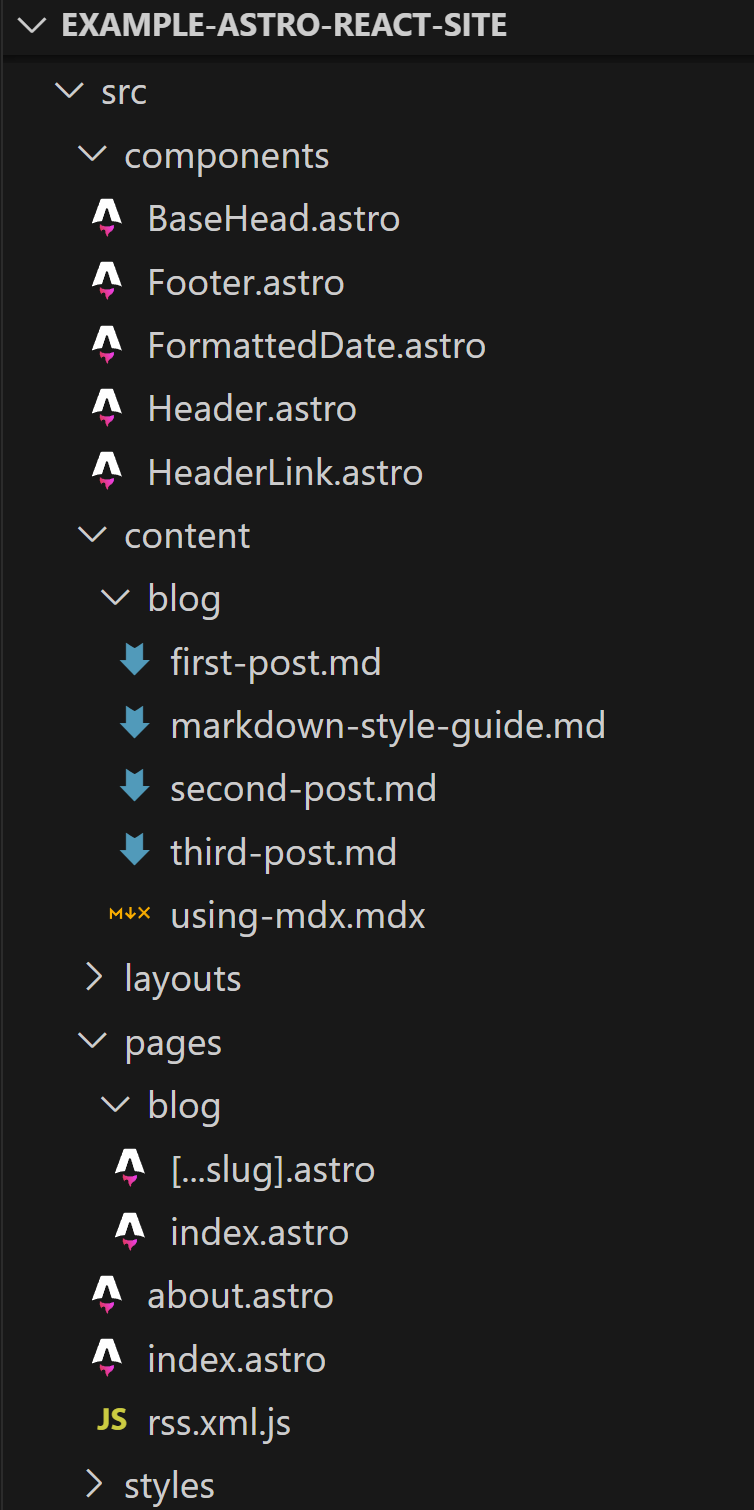
Screenshot showing a file explorer view of the Astro project, showing the ‘src’ directory containing numerous new files and folders.
In this template, the same stuff applies as before: you can use different file formats to create your content. However, for the specific blog posts, they must be in one of two file types as per the src/content.config.ts file:
import { glob } from 'astro/loaders';
import { defineCollection, z } from 'astro:content';

const blog = defineCollection({
	// Load Markdown and MDX files in the `src/content/blog/` directory.
	loader: glob({ base: './src/content/blog', pattern: '**/*.{md,mdx}' }),
	// Type-check frontmatter using a schema
	schema: z.object({
		title: z.string(),
		description: z.string(),
		// Transform string to Date object
		pubDate: z.coerce.date(),
		updatedDate: z.coerce.date().optional(),
		heroImage: z.string().optional(),
	}),
});

export const collections = { blog };
Markdown, and MDX.
MDX is really cool, since it allows more-complex content in your blog. For example, the articles on this website that are older than this article were written in Markdown. This article is written in MDX. The key difference for our Astro blog project is that I have the ability to import and render a ReactJS component like this one:
You can learn more about MDX and Astro’s integration of MDX in these places:
- MDX website11: https://mdxjs.com/
- Astro’s
@astrojs/mdxintegration documentation website12: https://docs.astro.build/en/guides/integrations-guide/mdx/
There is so much more to dig into within Astro and its super awesome templates, but this article is long enough! You’ve seen how easy it is to create an Astro project that uses ReactJS, and you’ve now seen it in two different types of projects.
Let’s at least confirm that all of this effort achieves the initial goal: static, separate HTML files for each webpage that users can visit on the website.
To confirm that, we need to build (a.k.a compile) the website. Run the build command found in your project’s package.json:
npm run buildThat command creates a dist directory in your repository. This directory is already in the project’s .gitignore file, so it won’t commit to GitHub - and that’s a good thing. Your builds do not want leftover junk from older builds polluting your latest and greatest work! The dist directory contains many HTML files and many folders, creating a great selection of routes in this Astro blog template:
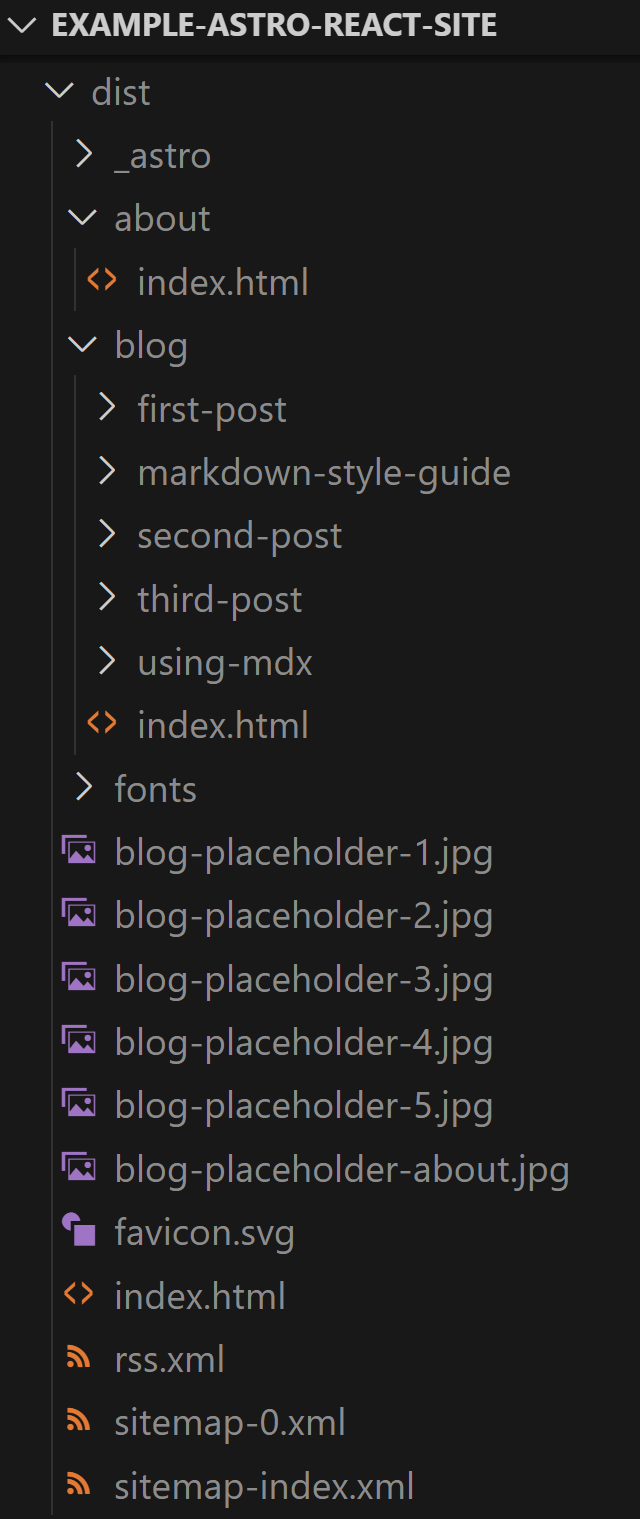
Screenshot showing a file explorer view of the Astro project, showing the ‘dist’ directory containing numerous new files and folders.
There are even features like RSS integration and sitemaps already implemented in this template, it’s really handy!
We can also test out that the compiled build works by running npm run preview, but that is more impactful in more-complex projects that involve things like searchable content (such as the Astro “Starlight” documentation website template).
With that working, what’s next? Well…
Deploying an Astro Website
Depending on how manually-involved you want to be in your project’s deployment process, this can be “simple and repetitive” or “mildly complex and hands-off”.
For example, in Netlify, you could drag and drop the contents of the dist folder into Netlify to manually deploy the compiled Astro website. You would have to manually do that for every update you make to the website, so we shouldn’t do that.
Since Astro has been rising in popularity, platforms such as Netlify do automatically detect and guide your deployment with suggested commands if you connect your Astro project’s GitHub repository to Netlify. GitHub repository integrations make Netlify deployment go smoother, in my opinion!
For example, this very website that you’re looking at is deployed via Netlify. Because the GitHub repository is connected to the Netlify site, every new commit pushed to the GitHub repository triggers a new deployment. In the “Build & deploy” section of Netlify, this is what keeps my website deployed:
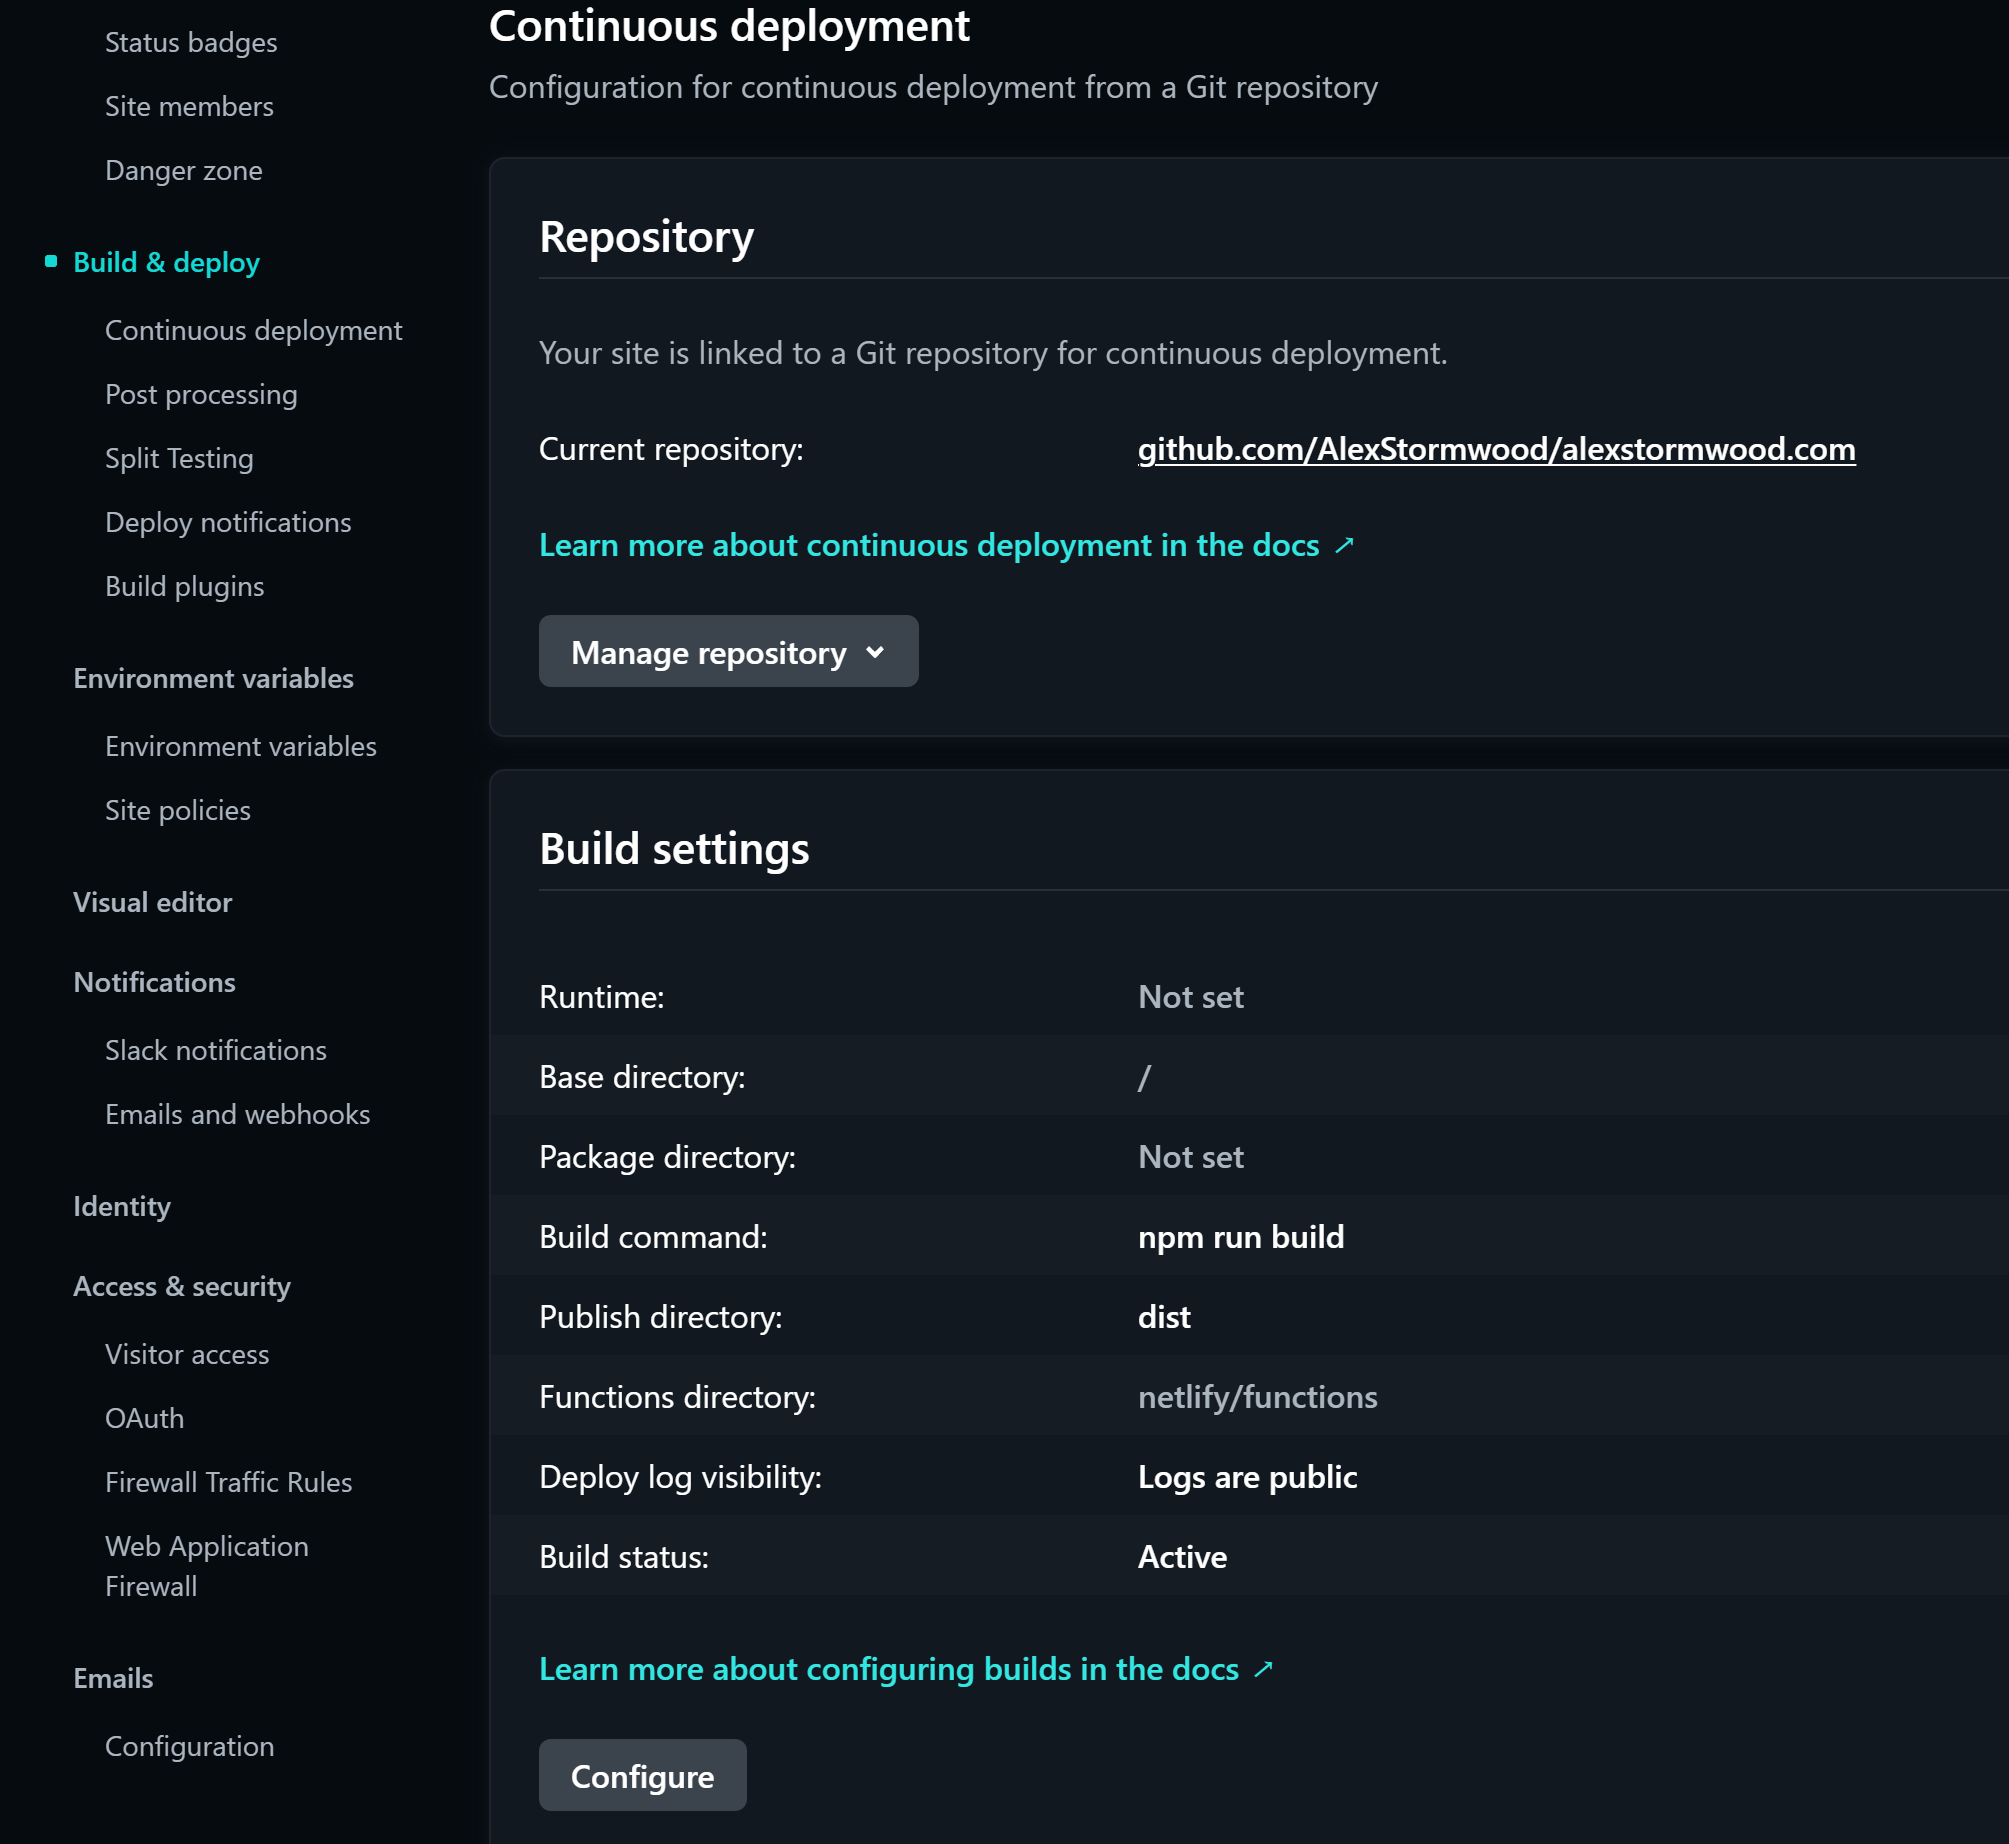
Screenshot showing a Netlify site settings page.
If you’re not using Netlify, or if you want to understand more about what those settings above are, the key things are:
- We must
buildthe Astro project to create a set of static website content. We do this withnpm run buildlocally, so an automated deployment process must use that command at some point as well. - The compiled static website content lives in the
distdirectory, which only exists after thebuildcommand has finished. So, if we want to publish the compiled website, we must assign the “publish directory” (or equivalent setting in alternative deployment systems) to bedistfor that to work.
…that’s it. If we were writing out a GitHub Actions workflow file and wanting to deploy to GitHub Pages instead of Netlify, you would see a similar process. It’s a bit of fiddling and is very unnecessary for this article if you just want to focus on Netlify usage.
Plus, making one Astro project work for both Netlify and GitHub Pages simultaneously is a headache well beyond the scope of this article due to impacts on relative links and site configuration in Astro… so… pick a deployment platform for your static websites and stick to that!
Summary
So, we’ve looked into the history of ReactJS and typical type of projects that ReactJS has been historically used for.
We’ve looked at the features of static websites, compared to single-page applications and web apps.
We’ve seen how we can use ReactJS in two types of Astro projects.
We’ve seen how Astro projects can be compiled into a batch of HTML files that are static.
We’ve seen how to deploy that static build output using the free Netlify platform, since static websites can be deployed for free there. There is still a pricing tier in Netlify13, but until you reach absurd amounts of hobby projects or millions of users per month for your static website, that’s not a concern.
We’ve seen a lot of stuff in this article!
Astro, like ReactJS, is a large and complex system. There’s so much more that you can dig into. I’m hoping that with this little scratch of the surface, you’ve gained some new knowledge and maybe some inspiration for how to build your next static website.
I really enjoy Astro, I really enjoy using it to make a content-driven website, and I find it really nice and smooth to integrate complex interactive systems like ReactJS components into an Astro website.
While writing this article out, I’ve also realised that there’s plenty of other things that can be dug deeper into: how we should use Astro for image optimisation, how we can set up programmatic search engine optimisation in our Astro blog websites, how we can set up programmatic social media content previews in our Astro blog sites, and so much more.
Feel free to dig into this website repository to see some more-complex things done to the Astro blog template, if you need inspiration.
This whole website is built on top of the concepts shown in this article - you can go really far with this stuff! And it can be very fun:
You can view the source code for this article here: https://github.com/AlexStormwood/alexstormwood.com/blob/main/src/content/blog/compiledreactjswithastro.mdx
See you in the next article!
References
Footnotes
-
Technology | 2024 Stack Overflow Developer Survey. (2024). Stackoverflow.co. https://survey.stackoverflow.co/2024/technology#most-popular-technologies-webframe-prof ↩
-
React Server Components – React. (2024). React.dev. https://react.dev/reference/rsc/server-components ↩
-
What I wish I had known about single page applications - Michael Pratt, Stack Overflow. (2021, December 28). Stackoverflow.blog. https://stackoverflow.blog/2021/12/28/what-i-wish-i-had-known-about-single-page-applications/ ↩ ↩2 ↩3
-
Schott, F. (2022, August 9). Astro 1.0. Astro. https://astro.build/blog/astro-1/ ↩
-
Schott, F. (2024, March 12). Astro DB. Astro. https://astro.build/blog/astro-db/ ↩
-
astro | npm trends. (2025). Npmtrends.com. https://npmtrends.com/astro ↩
-
astro vs next vs vite | npm trends. (2025). Npmtrends.com. https://npmtrends.com/astro-vs-next-vs-vite ↩
-
Markdown in Astro. (2021). Docs. https://docs.astro.build/en/guides/markdown-content/#the-content—component ↩
-
Front-end frameworks. (2025). Docs. https://docs.astro.build/en/guides/framework-components/#hydrating-interactive-components ↩
-
Themes | Astro. (2025). Astro. https://astro.build/themes/ ↩
-
Otander, J. (2017, December 23). MDX. MDX. https://mdxjs.com/ ↩
-
@astrojs/mdx. (2025). Docs. https://docs.astro.build/en/guides/integrations-guide/mdx/ ↩
-
Plans and Pricing. (n.d.). Netlify. https://www.netlify.com/pricing/ ↩